﻿<%@ Page Language="C#" AutoEventWireup="true" CodeBehind="AWSVPCSyncShare.aspx.cs"
    Inherits="cloudenterprise.AWSVPCSyncShare" MasterPageFile="Site.master" %>

<asp:Content ID="Content1" runat="server" ContentPlaceHolderID="ContentTitle">
    Host Your Own Sync & Share Solution in Amazon VPC
</asp:Content>
<asp:Content ID="Content2" runat="server" ContentPlaceHolderID="SEOBlock">
    <meta name="keywords" content="AMI, AWS, OwnCloud, OwnCloud alternative, Novell Filr, cloud storage, private cloud, cloud enterprise, enterprise cloud,  self-hosted dropbox, self-hosted owncloud, online storage, cloud storage, cloud storage client" />
    <meta name="description" content="CentreStack (GLADINET cloud enterprise) provides cloud storage related solutions for enterprise to self-host a secure Amazon Web Service based secure, private file sync and share solution. This white paper focuses on Amazon VPC deployment." />
</asp:Content>
<asp:Content ID="Content" runat="server" ContentPlaceHolderID="MainContent">
    <style type="text/css">
        .content
        {
            padding-bottom: 12px;
            vertical-align: top;
        }
        .ctitle
        {
            vertical-align: top;
            background-color: #e0e0e0;
        }
    </style>
    <a name='teams'></a>
    <table width="860" align="center" border="0" cellspacing="0" cellpadding="0" style="padding: 0px;">
        <tr>
            <td>
                &nbsp;
            </td>
        </tr>
        <tr>
            <td class="checkout" width="860" style="padding: 16px;">
                <a name='promo'></a>
                <table width="860" border="0" align="center" cellpadding="0" cellspacing="0" style="margin: 0px;
                    padding: 0px;">
                    <tr>
                        <td style="vertical-align: top; border-top: 0 solid #d0d0d0; text-align: center;">
                            <h1>
                                Host Your Own Sync & Share Solution in Amazon VPC</h1>
                        </td>
                    </tr>
                    <tr>
                        <td style="vertical-align: top; border-top: 0 solid #d0d0d0; text-align: center;
                            padding-top: 6px; padding-bottom: 16px;">
                            <span class="headsubtitle1">Provide a Dropbox-like Solution to Your Users with Security
                                and Control</span>
                        </td>
                    </tr>
                    <tr>
                        <td style="padding-left: 0px; padding-top: 16px; padding-bottom: 16px; font-size: 16px;">
                            <div class="toc" style="float: left;">
                                <b style="margin-left: 8px;">Picture Gallery Links</b>
                                <ul style="text-align: left; list-style-type: circle;">
                                    <li><a class="normal" href="features/msp-enterprise-web-access.aspx">Web Browser Access</a></li>
                                    <li><a class="normal" href="features/msp-enterprise-windows-desktop.aspx">Windows Desktop
                                        Access</a></li>
                                    <li><a class="normal" href="features/msp-enterprise-macosx.aspx">Mac OS X Desktop Access</a></li>
                                    <li><a class="normal" href="features/msp-enterprise-mobile-access.aspx">Mobile Access</a></li>
                                    <li><a class="normal" href="features/msp-enterprise-ios-phone-pad.aspx">iOS Access</a></li>
                                    <li><a class="normal" href="features/msp-enterprise-android.aspx">Android Access</a></li>
                                    <li><a class="normal" href="features/msp-enterprise-windows-phone.aspx">Windows Phone
                                        8 Access</a></li>
                                    <li><a class="normal" href="features/msp-enterprise-windows-store-app.aspx">Windows
                                        Surface (RT) Access</a></li>
                                    <li><a class="normal" href="features/msp-enterprise-file-server.aspx">File Server Access</a></li>
                                    <li><a class="normal" href="features/msp-enterprise-online-collaboration.aspx">Online
                                        Collaboration</a></li>
                                    <li><a class="normal" href="features/msp-enterprise-file-and-folder-share.aspx">File
                                        and Folder Share</a> </li>
                                    <li><a class="normal" href="features/msp-enterprise-file-server-migration.aspx">Migrate
                                        File Server</a> </li>
                                    <li><a class="normal" href="features/msp-enterprise-unify-branch-office.aspx">Unify
                                        Branch Office File Structure</a></li>
                                </ul>
                                <b style="margin-left: 8px;">Video Gallery Links</b>
                                <ul style="text-align: left; list-style-type: circle;">
                                    <li><a class="normal" href="features/VideoGallery.aspx">Video Links</a></li>
                                </ul>
                                <a style="margin-left: 8px;" href="http://gladinet.blogspot.com/2013/01/host-your-own-sync-share-solution-in.html">
                                    <img src="../images/tryitbtn.jpg" border="0" /></a>
                            </div>
                            <a name="intro"></a>
                            <p>
                                CentreStack was released in 2012. The goal was to help businesses
                                create a self-hosted file sync & share solution (dropbox-like solution) by leveraging
                                business’s own file server and existing Active Directory services.
                            </p>
                            <p>
                                As more and more customers discussing the use cases with us related to the self-hosted
                                sync and share solution, an important use case shows up - running the CentreStack enterprise
                                file sharing service from within Amazon VPC.
                            </p>
                            <p>
                                As customers migrating to the cloud, many of them are migrating to “Virtual Private”
                                data centers such as Amazon EC2. They will move their files to Amazon S3 and start
                                Amazon EC2 servers to connect to their data, from within a VPC (Virtual Private
                                Cloud). Basically, the Amazon EC2 servers are like on-premise servers that connect
                                to the company network.
                            </p>
                            <p>
                                So the interesting idea is: How to make CentreStack run on Amazon
                                EC2 servers?
                            </p>
                            <p>
                                What if the solution itself is a virtual appliance contained inside an Amazon Machine
                                Images (AMIs)?
                            </p>
                            <p>
                                As a starting point, we are announcing 2 AMI images that are publically available
                                from the Amazon N. Virginia data center.
                            </p>
                            <p style="padding-left:16px;">
                            <ul style="margin-left:16px;">
                                <li>CentreStack (Single Business) : GCE</li>
                                <li>CentreStack (Service Provider): GSP</li>
                            </ul>
                            </p>
                            <p>
                                You can get to the images by using the ami id or search for “GCE” or “GSP” or “gladinet”
                                inside the “public images”.
                            </p>
                            <br />
                            <h2>
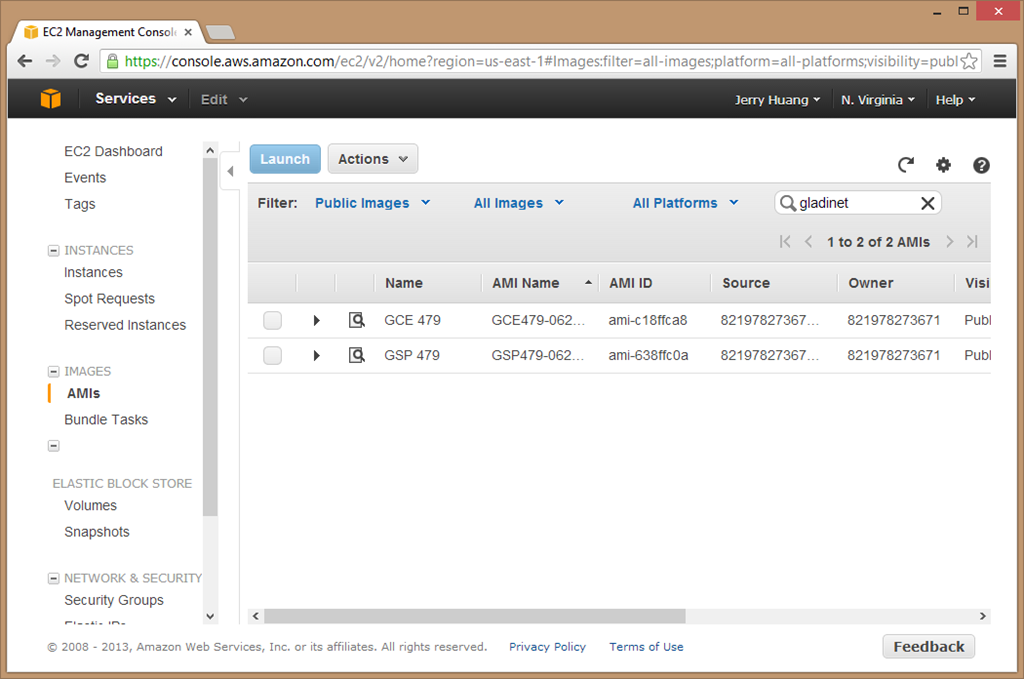
                                Step 1 – Find the AMI image</h2>
                            <p>
                                From within the Amazon Web Console, under the IMAGES/AMIs, search for GCE or GSP
                                or Gladinet, you will be able to locate the image.
                            </p>
                            <p>
                                (a) search for “gladinet”, the GCE entry is for CentreStack, single
                                enterprise package. The GSP is for Gladinet Cloud for Service Provider package.
                                The number is the build number such as build 479.
                            </p>
                            <img src="images/ami/ami1.png" width="888"/>
                            <h2>
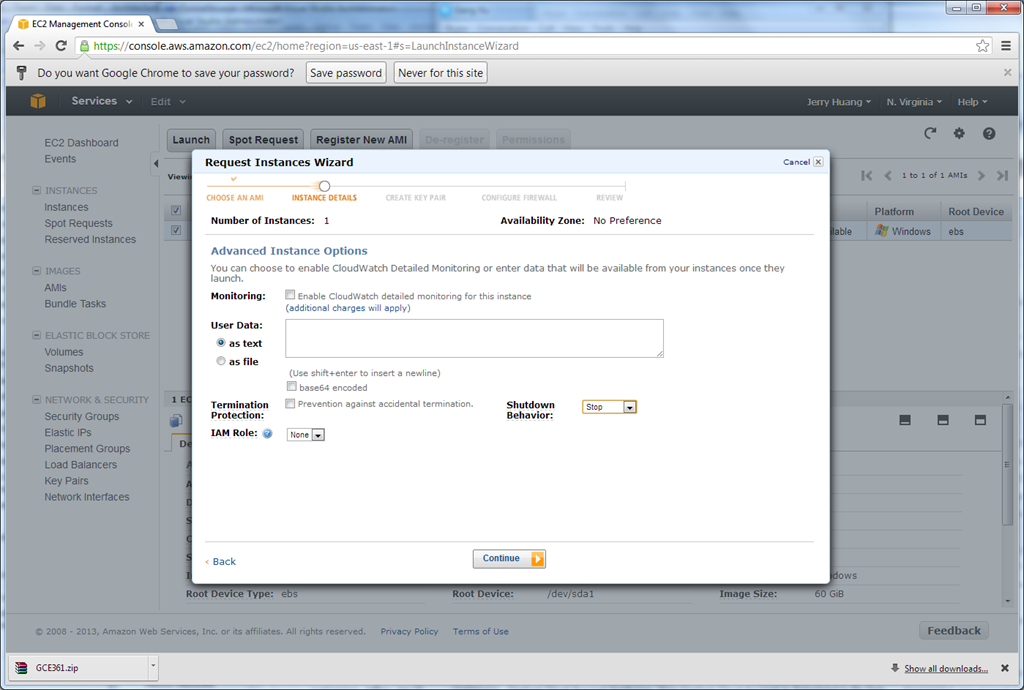
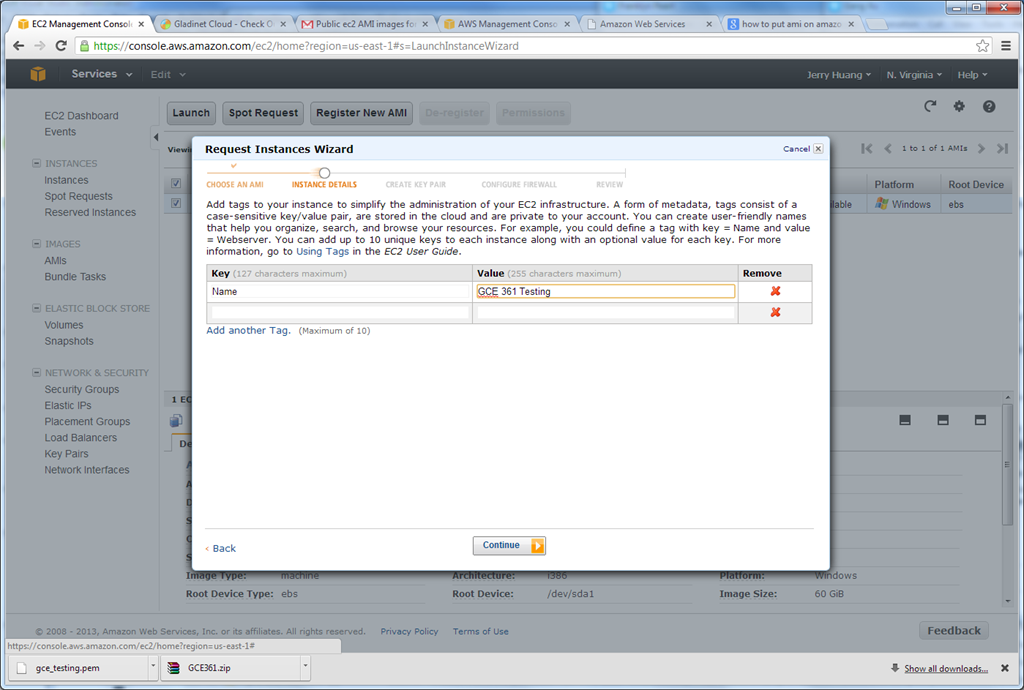
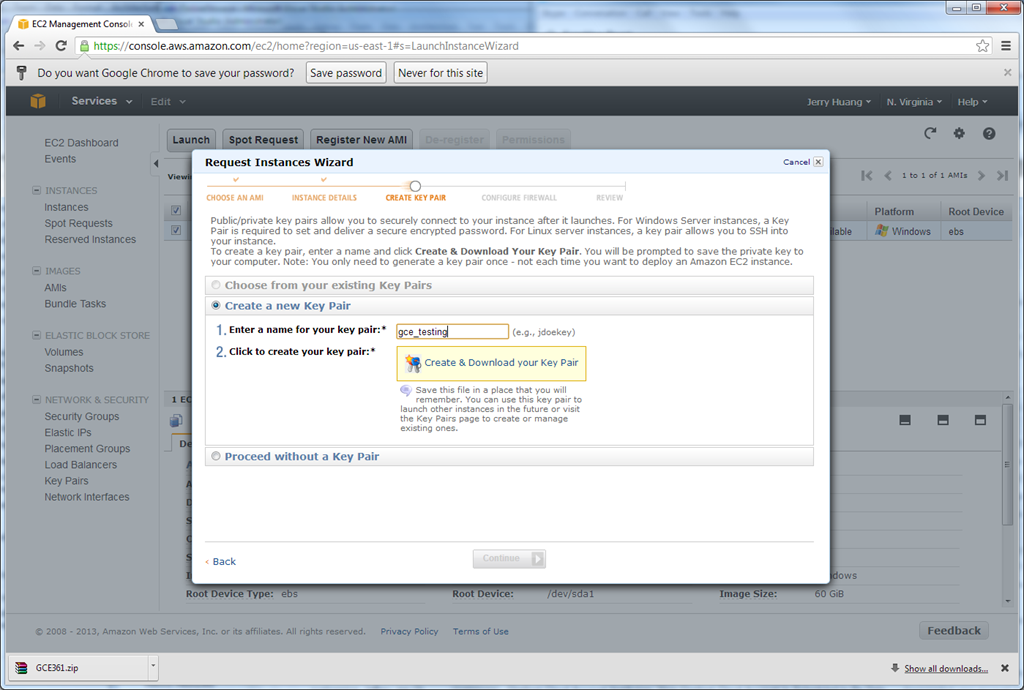
                                Step 2 – Launch an EC2 Instance with the AMI</h2>
                            <p>
                                After you find the AMI, you can right click and launch an EC2 instance based on
                                it.
                            </p>
                            <img src="images/ami/ami3.png" width="888"/>
                            <p>
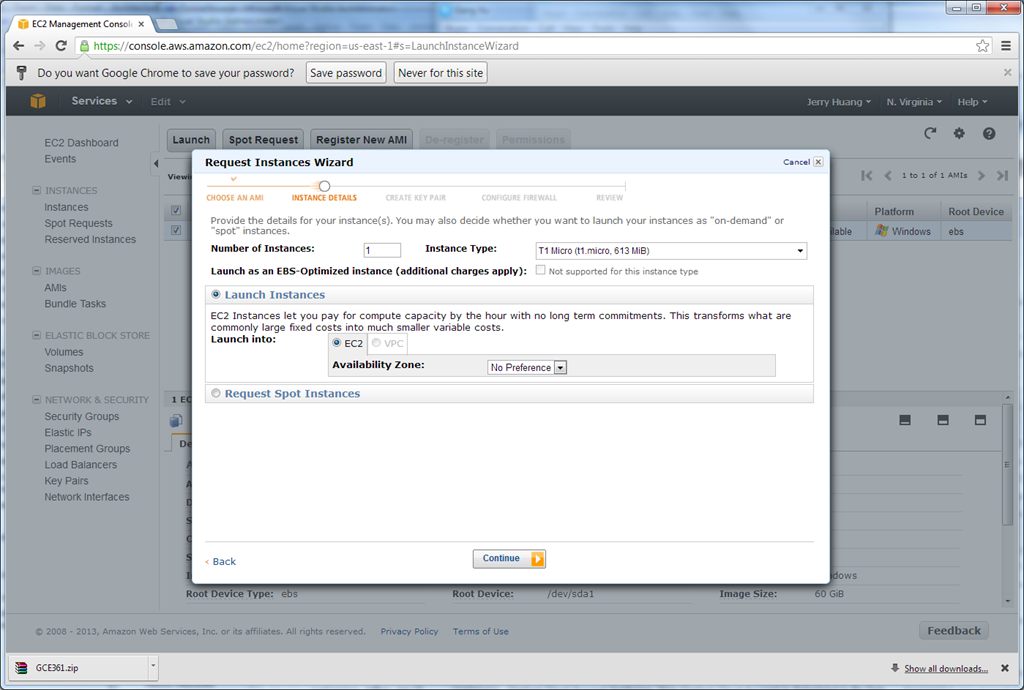
                                During the EC2 instance wizard, simply accept the default values.
                            </p>
                            <img src="images/ami/ami4.png" width="888" />
                            <p>
                                You can give it a name for the instance.
                            </p>
                            <img src="images/ami/ami5.png" width="888"/>
                            <p>
                                And create a new key pair if you don’t already have one.</p>
                            <img src="images/ami/ami6.png" width="888"/>
                            <p>
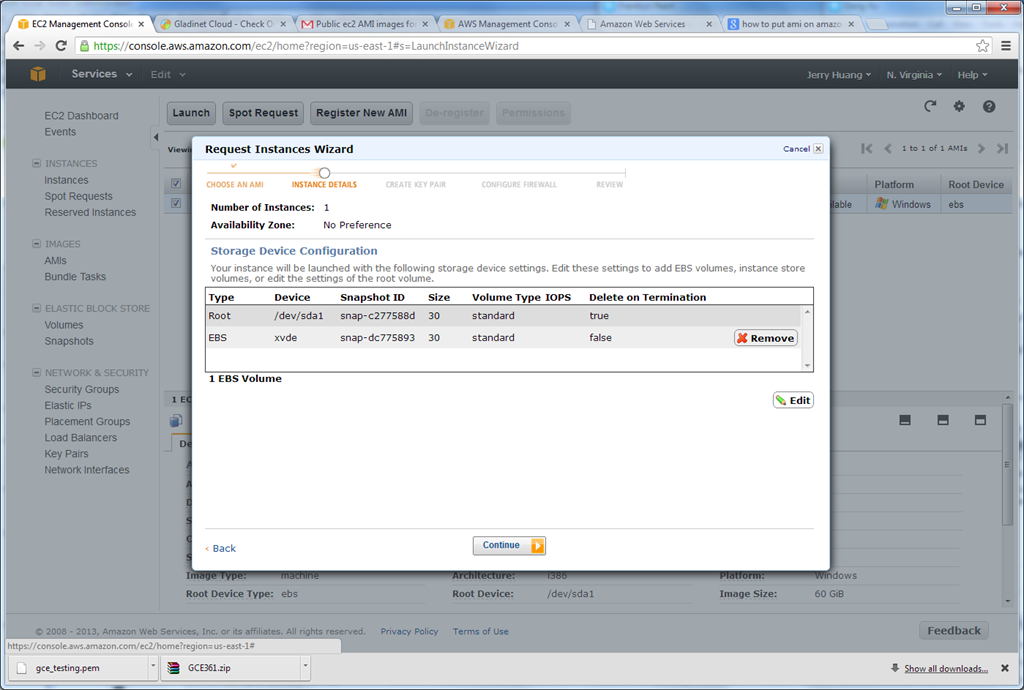
                                The instance has two drives, drive C and drive D. You will see a root volume and
                                an EBS volume. Both are required for the instance.
                            </p>
                            <img src="images/ami/ami7.png" width="888"/>
                            <h2>
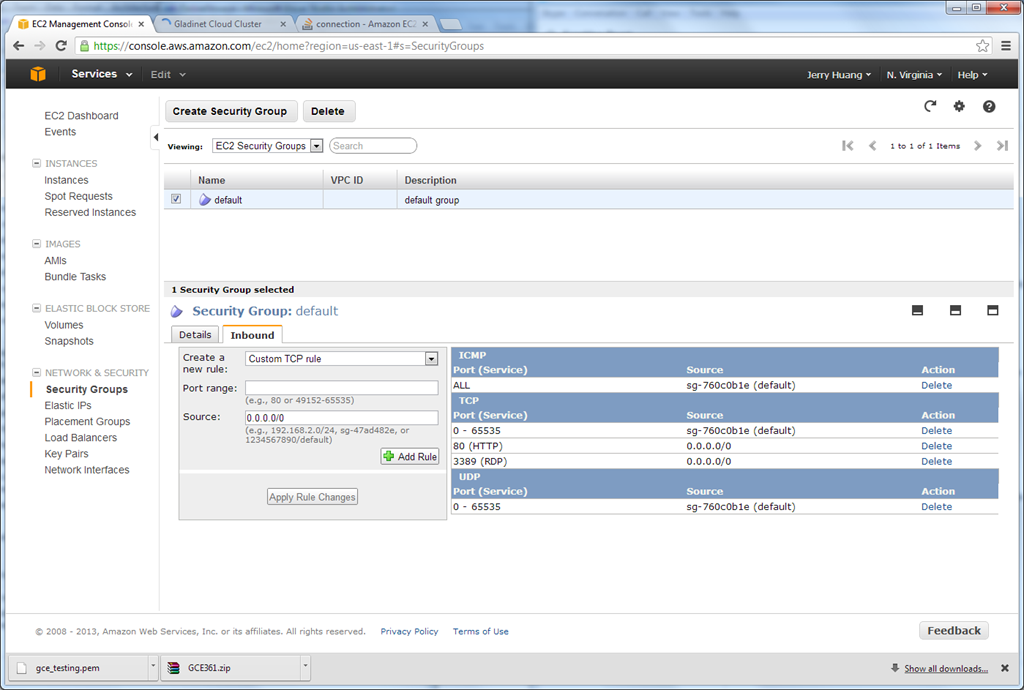
                                Step 3 – Open the Ports to the Instance</h2>
                            <p>
                                You will configure the basic ports for the instance. You will do it from the Security
                                Group. At least you need to open HTTP port (80) and SSL port (443). It is also recommended
                                to open port 8080 and port 8888, in addition to RDP port 3389.
                            </p>
                            <img src="images/ami/ami8.png" width="888"/>
                            <h2>
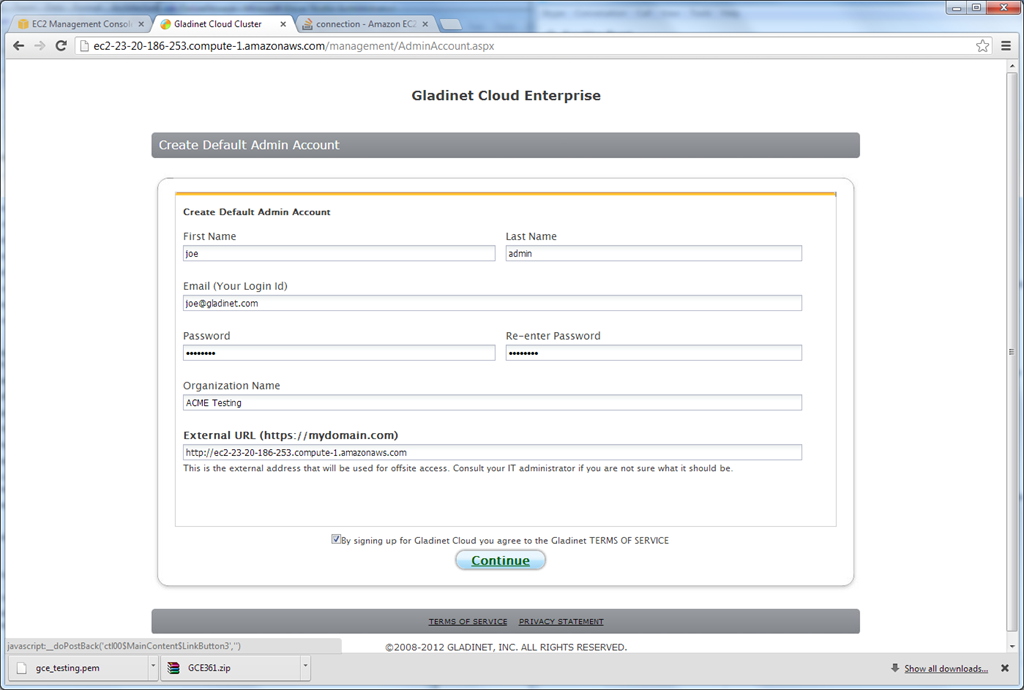
                                Step 4 – Configuration</h2>
                            <p>
                                You will point the web browser to the public DNS of the instance to start configuration.</p>
                            <p>
                                The first step is to put in your user name and password. This user will be the admin
                                user for the CentreStack instance.</p>
                            <img src="images/ami/ami9.png" width="888"/>
                            <p>
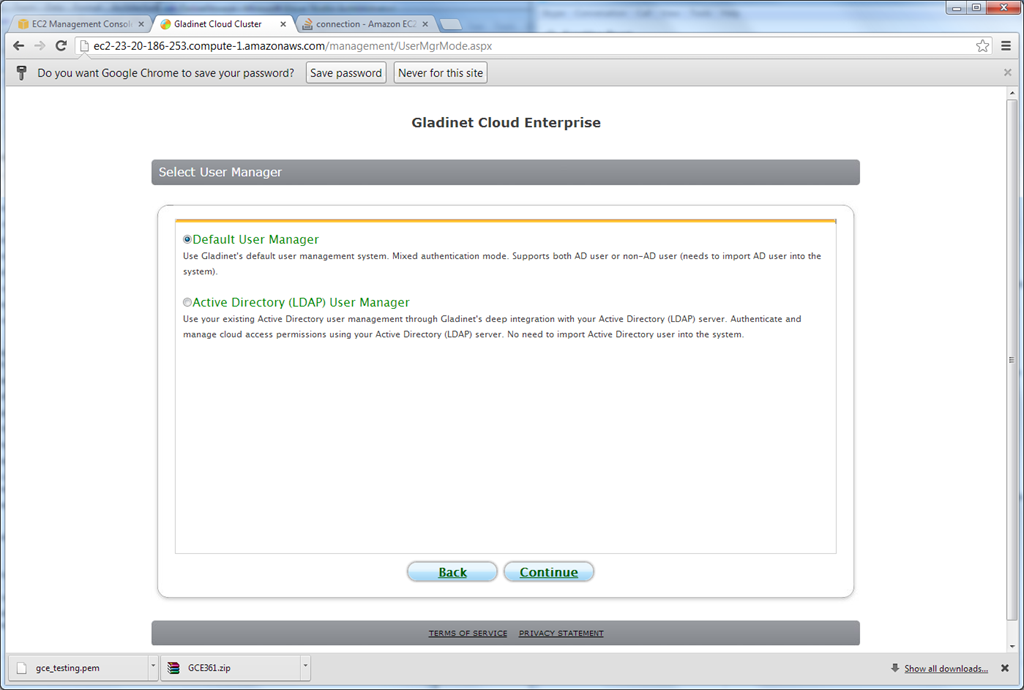
                                The second step of the configuration is to select the user manager. Usually you
                                can select default user manager. Or if you have Active Directory service ready,
                                you can use it too.
                            </p>
                            <img src="images/ami/ami10.png" width="888"/>
                            <p>
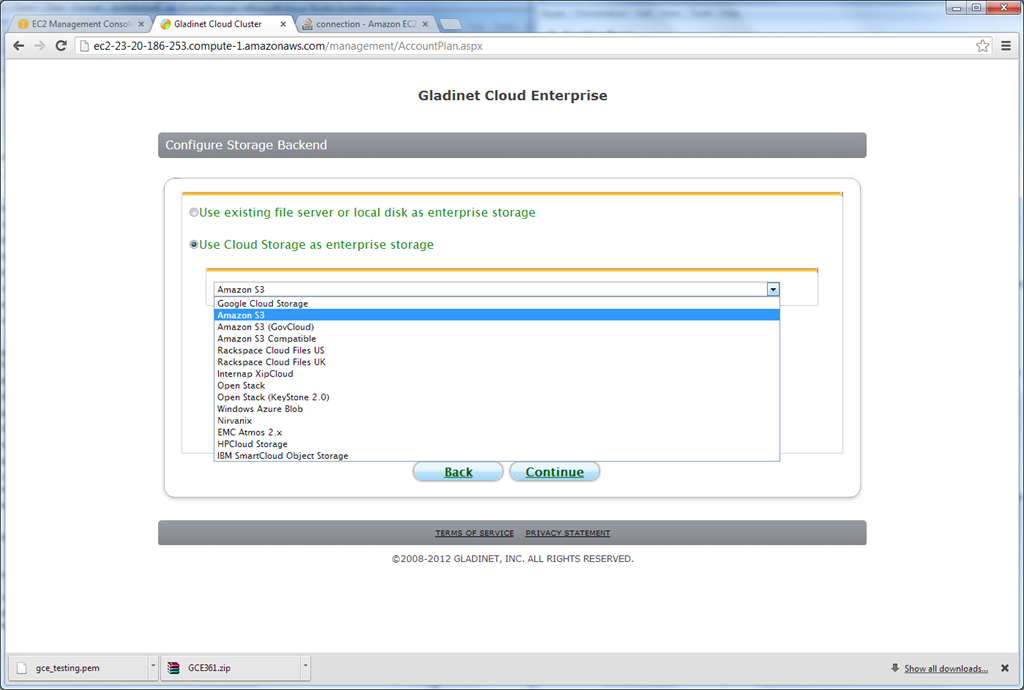
                                The third is to select a backend storage. Since this is running from Amazon EC2,
                                it is a natural choice to select Amazon S3 as the backend storage.
                            </p>
                            <img src="images/ami/ami11.png" width="888"/>
                            <p>
                                If you select Amazon S3, the next step will be to select a bucket from Amazon S3.
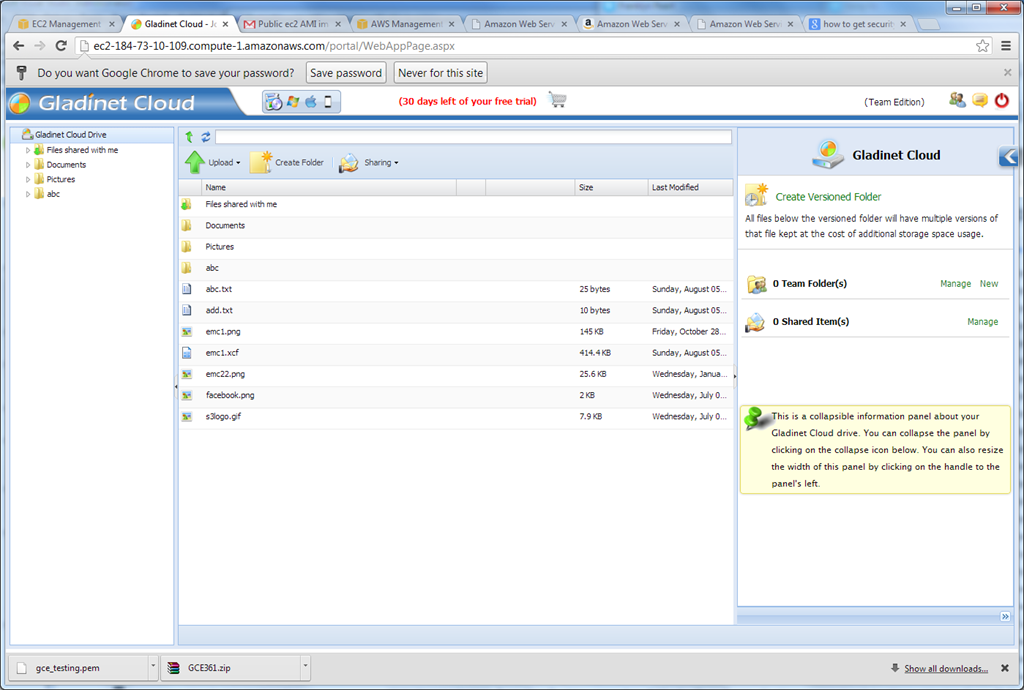
                            </p>
                            <img src="images/ami/ami12.png" width="888"/>
                            <h2>
                                Step 5 – Done!</h2>
                            <p>
                                It is done. After that, you will be looking at the web browser based file manager,
                                which is showing the contents of your Amazon S3 bucket. You can now proceed to use
                                the Gladinet Cloud team client, Gladinet Cloud team server, Android client and iOS
                                client to connect to your instance of the Gladinet Cloud.
                            </p>
                              <img src="images/ami/ami13.png" width="888"/>
                        </td>
                    </tr>
                </table>
            </td>
        </tr>
    </table>
</asp:Content>
