CentreStack
Installation Guide
Build 6.5.2033.32552
6/1/2015
________________________________________________________________________
Table of Contents
Step 1: Prepare the File Storage
Step 2: Prepare the Active Directory (Optional)
Step 3: Prepare the Database Server
Step 4: Prepare the Worker Nodes
Step 8: Check out the Management Console
Step 9: Enable SSL – Install SSL Certificate
Step 10: Set up Worker Node properties
Step 11: Verify External URL, Internal URL and Node Name
Step 12: Add the node to the Load Balancer
Step 13: Setup the Second Node (Worker Node #2)
Option 2 – Command Line Script Setup
13.1 – Preparation on the Worker Node #1
13.4 – Command Line Setup for the IIS ASP.NET and WCF applications.
13.6 - Sanity Check Worker Node #2
13.7 – Add the worker node 2 to the cluster
13.8 – Add the worker node #2 to the Load Balancer.
13.9 Pre-Compile ASP.NET Pages
Option #1 – GUI Installer for Upgrade
Option #2 – Command Line Upgrade
Step 2 – Copy files over to the Program Files.
Overview of CentreStack
CentreStack provides value-added services on top of cloud storage services or local storage services. Cloud Storage services include those from OpenStack Swift, Amazon S3 and its compatibles, Google Cloud Storage, HP Cloud Storage and many others. Local Storage Services include file server Storage, SAN or NAS storage. CentreStack value-added services can be summarized as Backup, Access, Sync and Share, Identity, Control and Collaboration (BASIC). The value-added services are also known as Enterprise File Sync and Share services (EFSS).
CentreStack is a cluster of web services built on top of the Microsoft Web Platform. It provides the BASIC value-added services that facilitate online storage access for PCs, Macs, File Servers, Web Browsers, and Mobile Devices.
The services can be deployed in flexible combinations to meet different needs. For example, you can deploy it on premise as a private cloud or you can deploy it off-premise in a data center, managed by your managed service provider (MSP) or you can deploy it in Amazon EC2-like environment as virtual-private deployment.
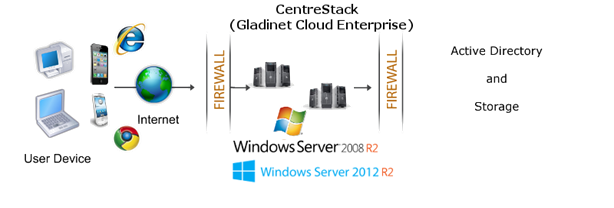
There are three different types of machines (or Virtual Machines). In the smallest deployment unit, the three different logical nodes can co-exist in one single machine (all-in-one deployment).
Ø Web Node
(If you have hardware load balancer or other kind of load balancing, you do not need web node, instead, worker node has web node functionality by default). The Web Node has functionalities such as Account Management, Sign-in and Load-balancing services. Depending on the load, you may need 1 to N such nodes. Normally we recommend for every 1 web front node, you can have 10+ worker nodes. When you have small deployments, you can skip web front nodes and combine them into worker nodes. All the installation work is the same. If you do not need the Web Node, you do not need to assign them in the cluster manager web portal.
Example: ACME Corporation deploys two web front nodes ‘node1.acme.com’ and ‘node2.acme.com’. Each node is running a copy of CentreStack, connecting to the same SQL database.
ACME Corporation acquires a domain name (DNS) of cloud.acme.com which can be load balance to ‘node1.acme.com’ and ‘node2.acme.com’.
When User points their browser to https://cloud.acme.com, it is directed to one of the node for login page.
NOTE1: If you have hardware load balancing available, you do not need to use web nodes at all.
NOTE2: Windows 2012 comes with Network Load Balancing (NLB). If you use NLB, you do not need web nodes at all.
Ø Worker Node
This type of node contains services like Web Browser Based File Manager, Storage Service Connectors, and more. Again, additional nodes can be added as the load increases. Because there is cache information located on each node, users will have an affinity to a single node once it is assigned.
Ø Database Node
The database contains persistent information for the system. In general, once a user is logged in, database access is no-longer needed for normal operations. If the database is down, most end user operations can continue with cached information (However, users need to access the database at least once to login and cache information).
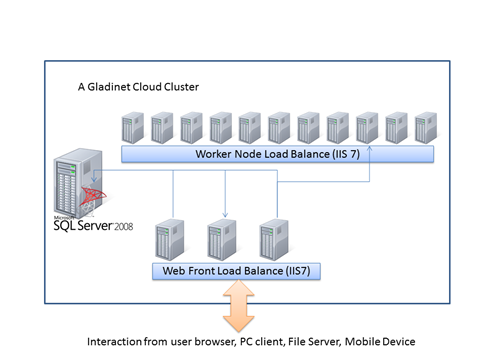
NOTE: If you have hardware load balancer or other kind of load balancer, you don’t need web front nodes from the above picture.
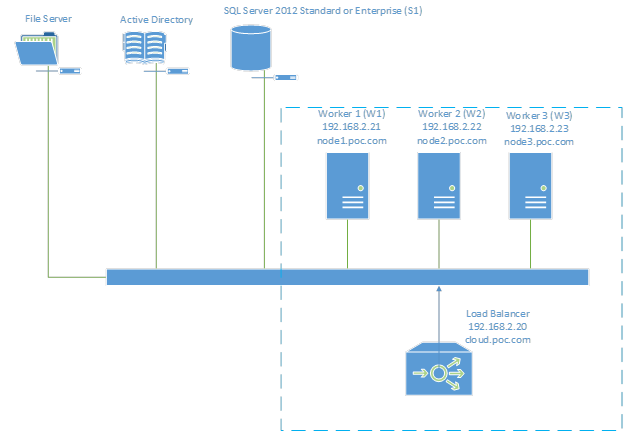
Deployment Diagram
In this installation guide, we will deploy the solution based on the diagram shown below. If this is the very first time you install CentreStack, it is recommend you try the All-In-One Deployment on a single machine first. Once you are more familiar with CentreStack components and its functionality, you can start setting up a production environment similar to the deployment diagram shown below.
In this guide, we use Windows DFS Network File Share as the backend storage. If you are using OpenStack Swift, Amazon S3-Compatible or EMC Atmos storage, they will work as well. The Storage Configuration page will be different for different storage options.
In this installation guide, we will be using Windows Server 2012 R2, which is the recommended Server Operating System for CentreStack solution. (Other supported Operating Systems are Windows 2008 R2 and Windows 2012)
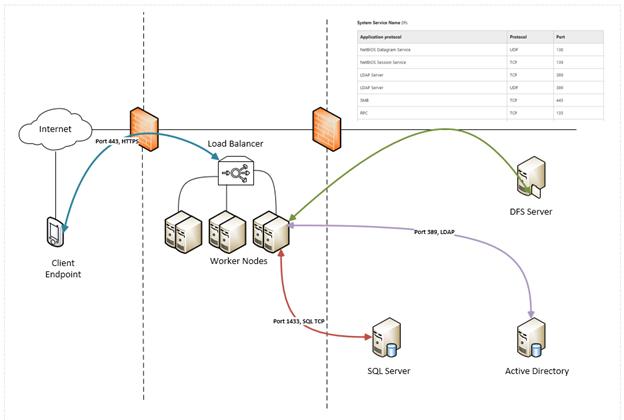
From a different perspective, including the clients and the ports, the diagram may look like this:
Step 1: Prepare the File Storage
CentreStack is a middleware built on top of your file storage. So first question is where you will have the file storage for the solution?
Your file storage can be a Windows File Server network share; it can also be a container inside a private instance of OpenStack Swift, Amazon S3 compatible storage or EMC Atmos storage service. You will need the basic access information ready. For example, if it is a Windows File Server, you will need the UNC
path to the network share and the user credential for accessing the folder. If it is OpenStack Swift, you will need the authentication URL and credentials.
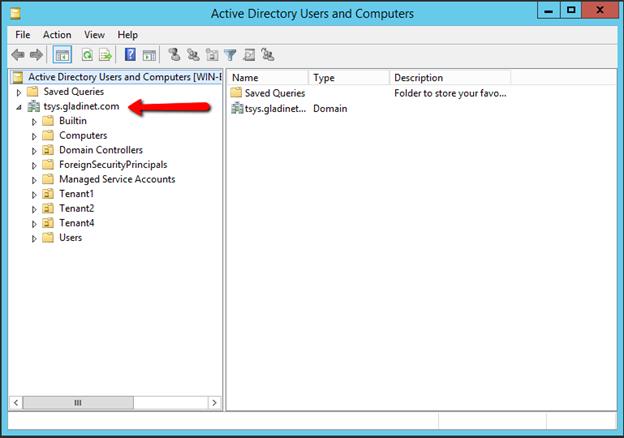
Step 2: Prepare the Active Directory (Optional)
If you need Active Directory integration, you will need Active Directory information such as the Active Directory location (DNS name), a service account that can access the Active Directory and the Active Directory’s friendly Domain Name.
If you don’t need Active Directory integration, you can skip this step. In the diagram below, the tsys.gladinet.com is the Active Directory’s friendly domain name.
Step 3: Prepare the Database Server
There are two places that store persistent information. The first place is the File Storage mentioned in Step 1. The second place is the SQL Server database. There is configuration information such as username, team folder, shared folder, login token in the database. There is also runtime information such as audit trace and file change log in the database.
You can use any SQL Server Editions, such as the SQL Express, SQL Server Web Edition, SQL Server Standard Edition or SQL Server Enterprise Edition.
The primary decision factor is whether you want to setup High Availability for SQL Server, such as database mirror, database replication, Always-On Cluster or Always-On Fail Over Group. Different SQL Server editions offer different high availability features. In the case of SQL Express, it doesn’t have any built-in high-availability features; while SQL Server Enterprise Edition offers many high-availability features.
The second decision factor is how much logging information you would like to keep in the database. SQL Server Express 2008 has 4GB size limit and SQL Server Express 2012 has 10GB size limit.
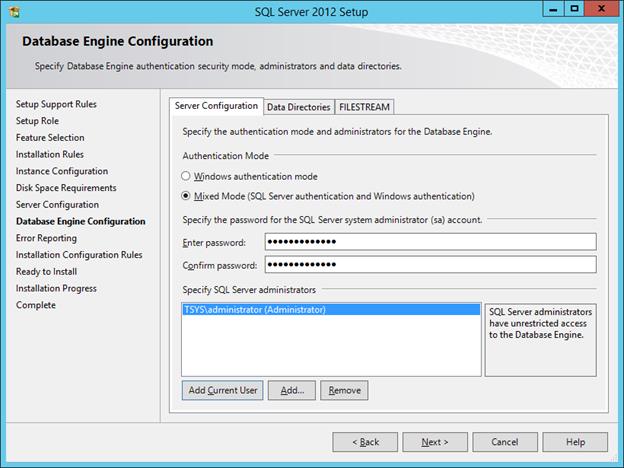
When preparing the SQL Server, ensure the SQL Server Authentication (Mixed Mode) is enabled. During the setup of the first worker node, the installer will need to create a database, create tables inside the database and create stored procedures in the database. So it requires a SQL security account that has enough privileges for the installation.
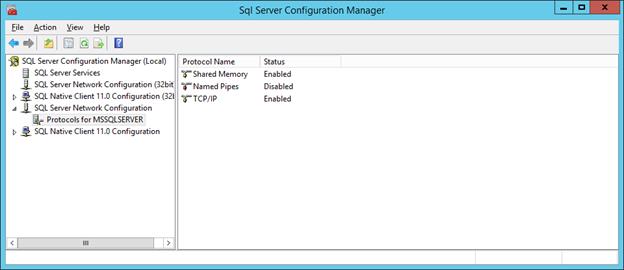
Make sure TCP protocol is enabled and firewall is opened to accept SQL connections. Default TCP port is 1433 and that port needs to be open on firewall. If you have SQL Server listening on a different port, that port will need to be open as well.
Step 4: Prepare the Worker Nodes
The easiest way to prepare the worker node is to install from scratch a clean Windows Server 2012 R2 OS with English locale and make sure the worker nodes are all in the same time zone.
We recommend Windows server 2012 R2 running on Virtual Machine environment.
|
Component |
Requirement |
Notes |
|
Operating System |
· Windows Server 2008 R2 with Service Pack 1, Standard or Enterprise Edition · Windows Server 2012 · Windows Server 2012 R2 |
|
|
CPU |
· 32 or 64-bit architecture with Intel Pentium (x86/x64) · AMD Opteron family · AMD Athlon 64 family |
64-bit recommended |
|
Memory |
8GB RAM |
16 GB is preferred |
|
Disk space |
100 GB (SSD if available) |
|
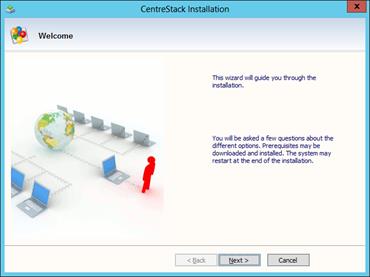
Step 5: Start Installation
Login to the first worker node console (RDP or physical console are fine) with administrator rights. Start the installer by double click on it.
You will see the welcome screen.
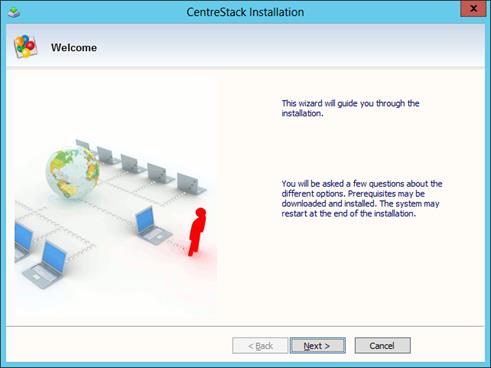
Click Next>
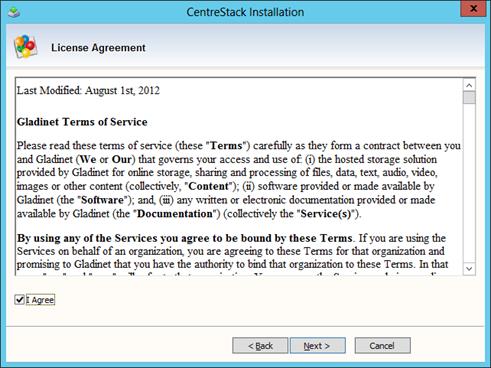
And accept the EULA
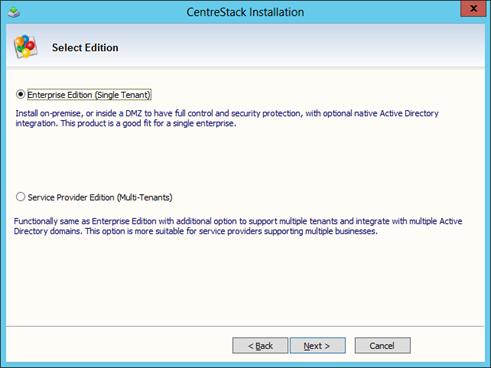
If you are installing for single Enterprise, select the “Enterprise” option, otherwise, select the “Service Provider Edition – Multi-tenants” option.
For the next screen, we will select the second entry for it to connect to the existing database.
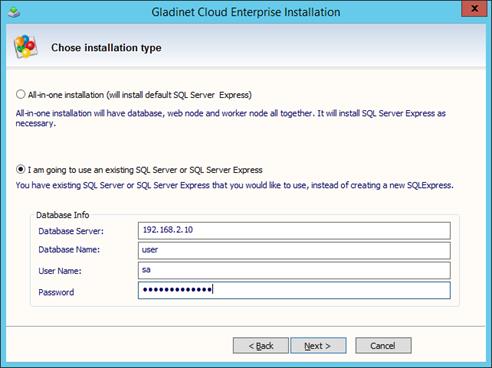
For the Database Server, if it is the default MSSQLSERVER instance, you can just type the IP Address or DNS name. You can verify this by going to the database server and look under the Services.
For example, the following Services screenshot was taken from the database server and the database instance is indeed called MSSQLSERVER.
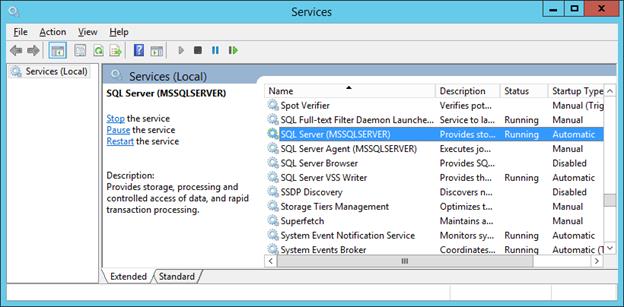
The Database Server entry can also take on other forms. For example, if you have SQLEXPRESS on server dbserver the entry could look like dbserver\SQLEXPRESS.
If your SQLSERVER is on another port, the Database Server entry can also be db.mydomain.com, 2048 (if the port is on 2048)
Click ‘Next>’
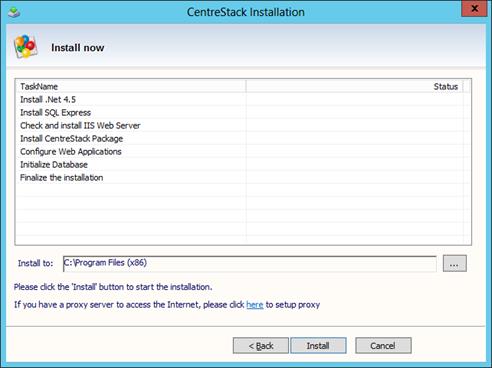
And Click Install.
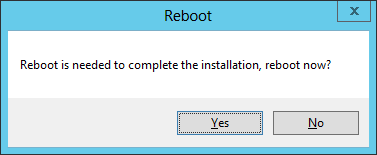
Once installation is completed, a reboot is required. Reboot now.
Step 6: Initial Configuration
Configuration page will be displayed after the reboot.
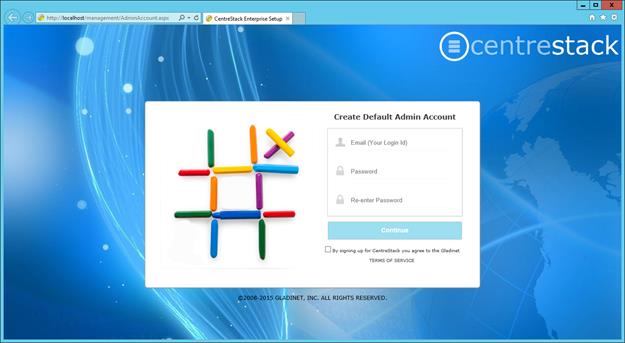
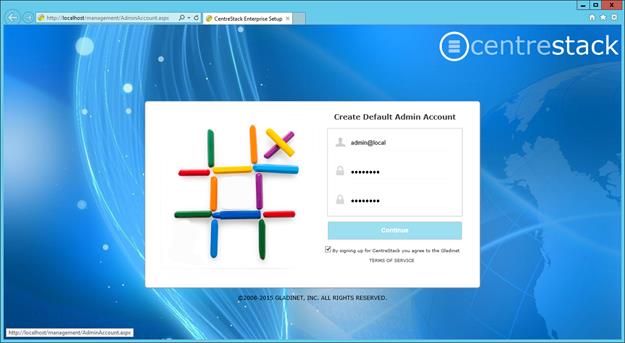
Here, you will setup the master administrator’s account first.
Next screen is to setup the storage location for the default admin. You will use a service account (can’t change password, account never expire) to connect to your file storage. Since most companies have password policy to expire password in 90 days, you will use a service account here so it doesn’t expire in 90 days.

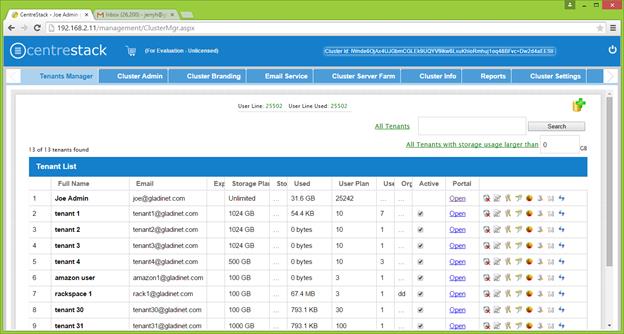
After that, the default admin’s account is ready. And the page shows up is the “Cluster Manager”
Step 7: Check Out Web Portal
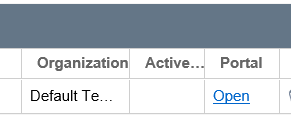
Click the Portal – “Open” Link for the default master admin to view his files/folders over the web portal.
Here is the files and folder view.
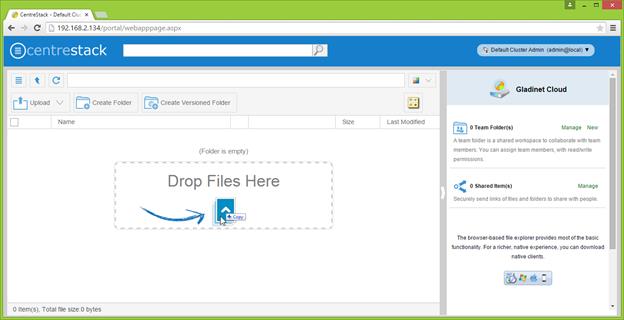
Now do some simple file/folder operations to sanity check the storage connection.
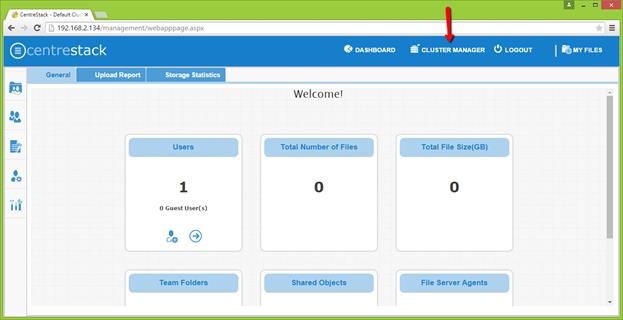
Step 8: Check out the Management Console
To access to the Management Console, click on the top right username entry.
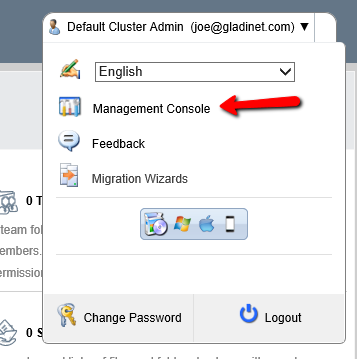
Here is the management console.

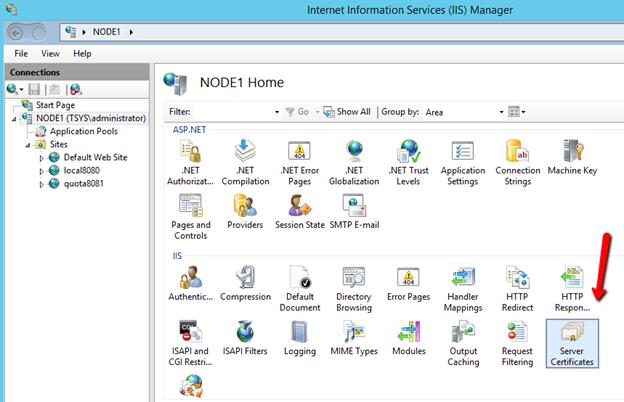
Step 9: Enable SSL – Install SSL Certificate
You will install the SSL certificate by using the IIS Manager. Look for “Server Certificates” and double click on it.
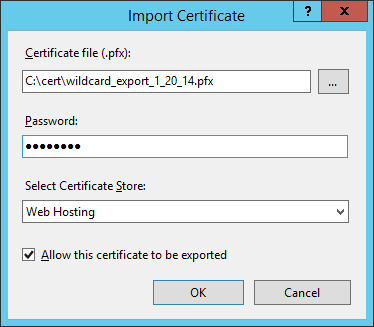
Click on “Import” to import a SSL Certificate. Leave the Certificate Store as “Personal” or “Web Hosting”, either way is fine.

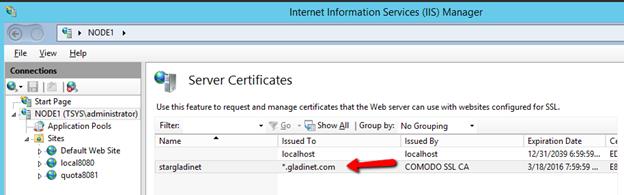
Verify that the certificate is available:
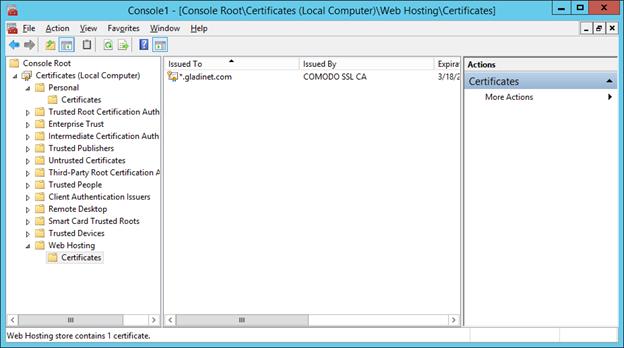
You can also verify the SSL certificate from the MMC/Certificates snap-in (Local Computer)
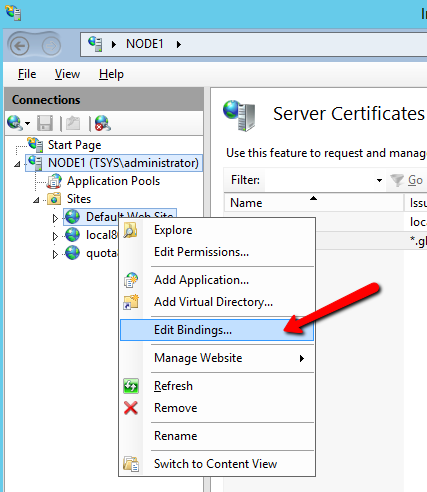
Now you can bind the “Default Web Site” to the SSL certificate for https. Right click on the “Default Web Site” and select “Edit Binding”
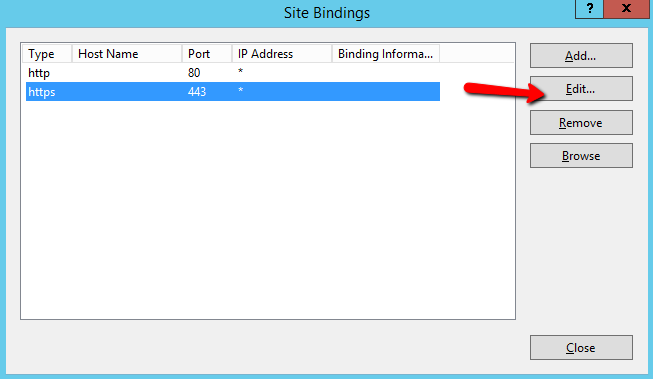
At the binding dialog, edit the https binding.
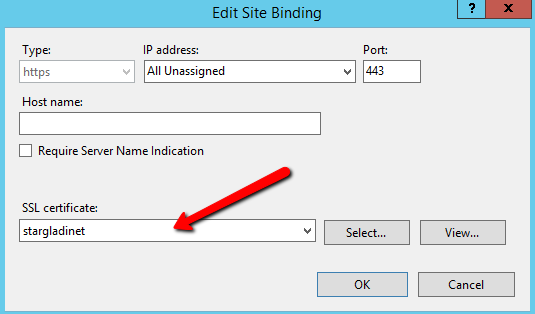
Now change the SSL Certificate binding dropdown to the imported SSL certificate.
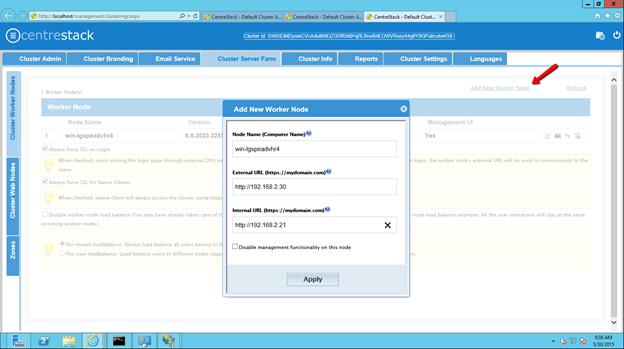
Step 10: Set up Worker Node properties
Log in to the Web Portal as the master administrator, go to the “Cluster Manager” page. If you have the service provider option, the default page after cluster admin login will be the “Cluster Manager” page.
If you have the enterprise option, the default page is the web based file manager. You will need to click the Management Console, and then the “Cluster Manager” to go to the “Cluster Manager” page.
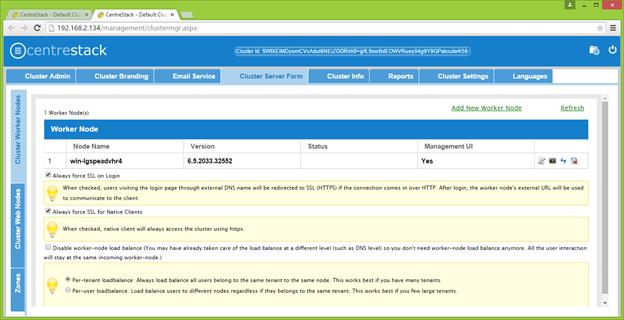
and click on the “Cluster Server Farm” page, the default tab (on the left, vertical) is the “Cluster Worker Nodes”
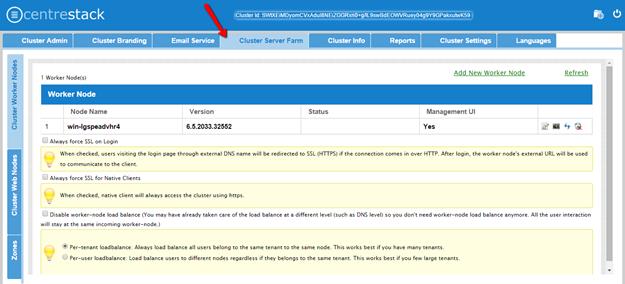
Now check the “Always force SSL on Login” and “Always force SSL for Native Clients”.
NOTES: If you use self-signed SSL certificate, the web portal is the only client that allows you to login after some SSL certificate warning. All other native clients such as Windows, mobile, and Mac clients will reject the connection.
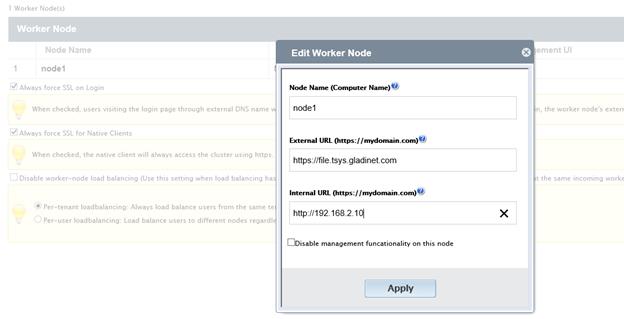
You will also modify the node property for the node.
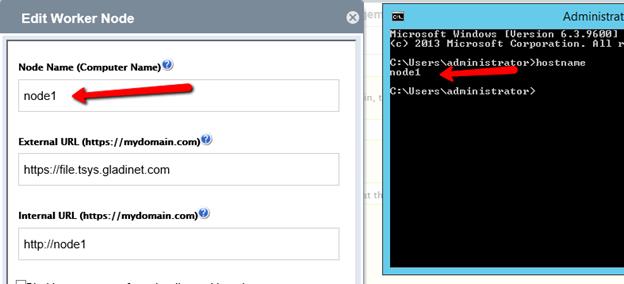
The Node Name needs to match the hostname of the node.
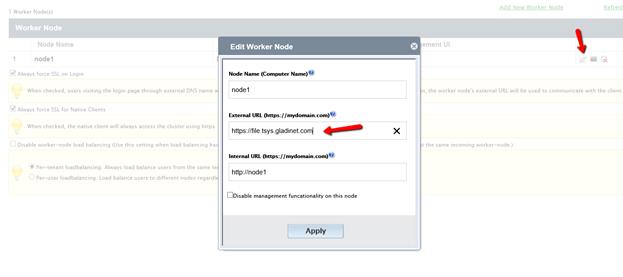
The external URL shall match the external URL for HTTPS. (If you do not have SSL certificate installed yet, this can be HTTP for now).
The internal URL will be the internal IP address or private DNS name.
Step 11: Verify External URL, Internal URL and Node Name
Verify External URL
It is very straight forward to verify external URL is set correctly. You just need to point your web browser to the external URL and verify that the Login Page shows up and there is no SSL warning.
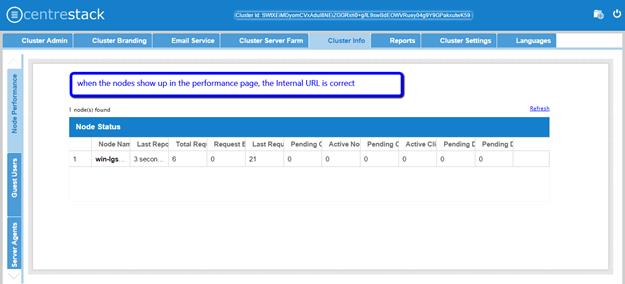
Verify Internal URL
For the verification of Internal URL, you can use the Node Performance page to make sure the node performance information shows up. (Cluster Info -> Node Performance)
Verify Node Name
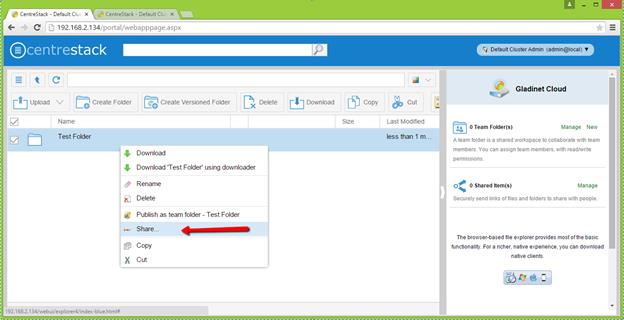
To verify node name is correct, you will do a folder share and verify the email received is correctly pointing to external URL.
If you just need one single worker node, you can stop here. It is all set and ready.
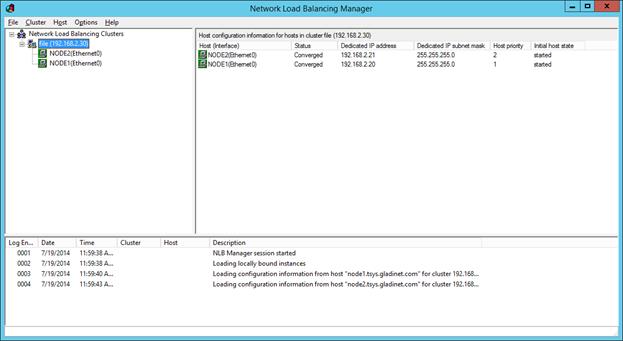
Step 12: Add the node to the Load Balancer
This step depends on the type of Load Balancer you have.
The following will use Windows Server 2012 Network Load Balancer as an example. In the active directory (tsys.gladinet.com), we create a file.tsys.gladinet.com NLB cluster with virtual IP = 192.168.2.30.
NOTE: Network Load Balancer is a standard Windows Server 2012 feature.
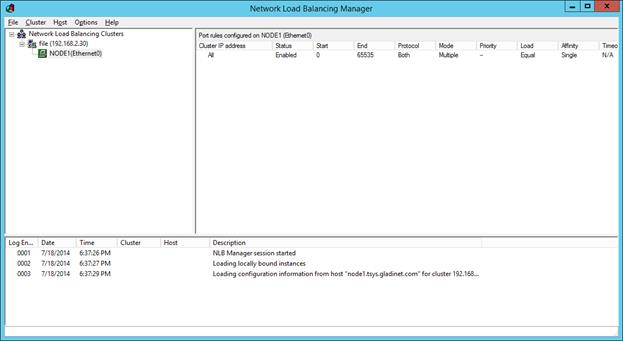
We can verify that the 192.168.2.30 virtual IP is loading in web browser:
Step 13: Setup the Second Node (Worker Node #2)
There are two options to setup the second node.
Option 1 – GUI Setup
The first way is to repeat the exact same steps for setting up the first worker node. If it is possible to sit in front of the console or the Remote Desktop Console and click through the installation wizard, this is very straight forward to install worker nodes.
If GUI installer is all you need, you can skip the Options 2 section.
Option 2 – Command Line Script Setup
There is also a second option to clone the first node to the second node. The second option is completely scriptable. In case you need to prepare 10+ worker nodes, the second option may be easier compared to sitting in front of the Graphic User Interface and clicking through the UI keys and buttons.
To explain scripting, we will break up the script into steps. Once you understand what each step does, you can put all the command lines together into a single script file.
For scripting we use PowerShell, so all the commands below will be executed inside PowerShell.
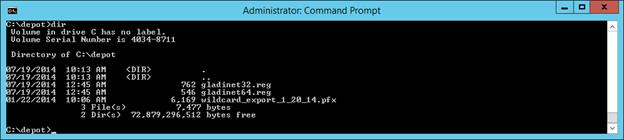
13.1 – Preparation on the Worker Node #1
We will clone the program files and the registry entry. This step will export the registry and save them as registry files first. Also, we will save the SSL certificate here as well. This is a one-time preparation step.
(The bold text with character shading indicate script commands to run.)
On worker node #1, first we will make a directory to store the registry file
mkdir c:\depot
After that, we will change directory into the folder
cd c:\depot
We will export the 64-bit of the registry key
reg export HKEY_LOCAL_MACHINE\SOFTWARE\Gladinet gladinet64.reg /reg:64
The operation completed successfully.
We will export the 32-bit of the registry key
reg export HKEY_LOCAL_MACHINE\SOFTWARE\Gladinet gladinet32.reg /reg:32
The operation completed successfully.
Now, we will verify the two registry files exported into our depot directory.
C:\depot>dir
Directory of C:\depot
07/19/2014 12:20 AM 762 gladinet32.reg
07/19/2014 12:20 AM 546 gladinet64.reg

Now copy the SSL certificate file into this folder as well.
After copying in the SSL certificate in the depot directory, the directory structure will look like this:
NOTE: When you export the SSL certificate, also import the private key.
We will also need to get the SSL certificate’s Thumbprint for later use by using a PowerShell Command. The thumbprint string will be used in script to import SSL certificate to IIS automatically. For example, the thumbprint below will be used later.
E88BC131D403B9EF5AA44DC520D3BABDB93E5886
PS C:\> Get-ChildItem -path cert:\LocalMachine\My
Directory: Microsoft.PowerShell.Security\Certificate::LocalMachine\My
Thumbprint Subject
E88BC131D403B9EF5AA44DC520D3BABDB93E5886 CN=*.gladinet.com, OU=COMODO SSL Wildcard, OU=Domain Control Validated
E50A764700D92D717E8CE21DCF99CAB5F5280198 CN=localhost
13.2 - Clone Program Files
Now, on worker node #2, we will copy c:\Program Files (x86)\CentreStack from worker node #1 to worker node #2
We will go to the worker node2’s administrative command prompt with PowerShell.
First change directory to the c:\Program Files (x86)\ directory.
cd "C:\Program Files (x86)"
Second, we will map a network drive to the worker node #1.
net use z: \\node1.tsys.gladinet.com\c$
Third, we will copy over the “CentreStack” folder.
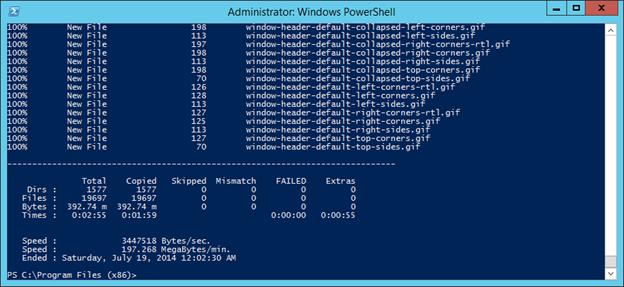
robocopy "z:\Program Files (x86)\CentreStack" "CentreStack" /s
When it is done, the PowerShell Window looks like this:
13.3 – Clone the Registry
Now we will copy over the registry file from worker node #1.
On worker node #2, first we will create a folder to receive the files
C:\>mkdir c:\depot
After that, we will change directory into the folder
C:\>cd c:\depot
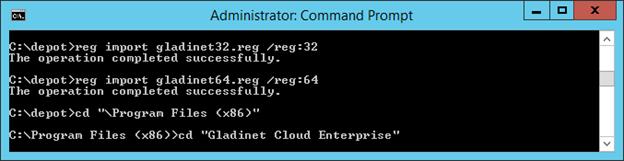
Now, we will copy over the registry files (the z: drive is already mapped to worker node #1’s c$ share)
C:\depot>copy z:\depot\*.*
z:\depot\gladinet32.reg
z:\depot\gladinet64.reg
2 file(s) copied.
Now, import the registry files. 32-bit first
C:\depot>reg import gladinet32.reg /reg:32
The operation completed successfully.
Now import the registry file. 64-bit second
C:\depot>reg import gladinet64.reg /reg:64
The operation completed successfully.
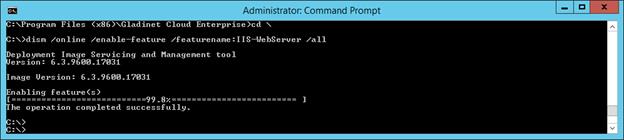
13.4 – Command Line Setup for the IIS ASP.NET and WCF applications.
Next, we need to make sure IIS WebServer role is enabled, WCF is activated and so on.
Enable IIS-WebServer first
dism /online /enable-feature /featurename:IIS-WebServer /all
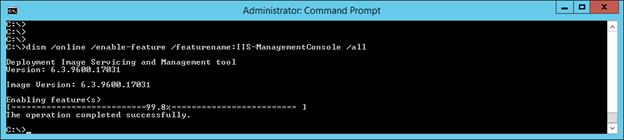
Enable IIS Management Console
dism /online /enable-feature /featurename:IIS-ManagementConsole /all
Enable ASP.NET45
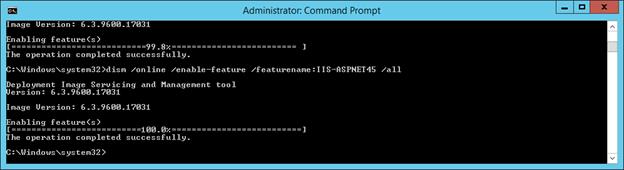
dism /online /enable-feature /featurename:IIS-ASPNET45 /all
Enable WCF
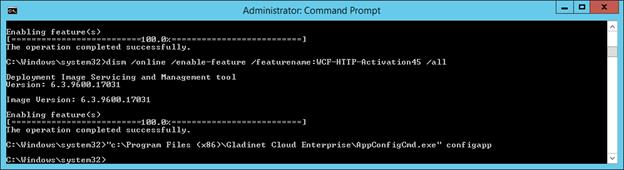
dism /online /enable-feature /featurename:WCF-HTTP-Activation45 /all
Setup Web Applications
Run the following command to set it up.
& "c:\Program Files (x86)\CentreStack\AppConfigCmd.exe" configapp
13.5 - Import SSL Certificate
First we copy over the SSL certificate from node1
cd c:\depot
copy /y z:\depot\*.pfx
Then we import the certificate, replace the <password> with the real password of the PFX file.
certutil -p <password> -importPFX wildcard_export_1_20_14.pfx
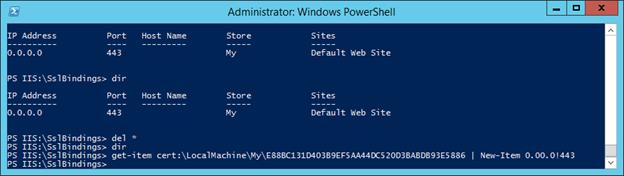
After that, we will use PowerShell command to set it up in IIS. First we need to import the WebAdministration module.
PS C:\> Import-Module WebAdministration
After that, we will go to the SslBindings
PS C:\> cd IIS:\SslBindings
PS IIS:\SslBindings> del *
Now, we use the certificate and apply it to IIS. In the example below, the E88…886 thumbprint part matches the thumbprint string we had earlier on worker node #1
PS IIS:\SslBindings> get-item cert:\LocalMachine\My\E88BC131D403B9EF5AA44DC520D3BABDB93E5886 | New-Item 0.00.0!443
Now, Worker Node #2 will be ready after a reboot. Reboot now.
13.6 - Sanity Check Worker Node #2
After worker node #2 is up, you can use the http://localhost on worker node to check that the worker node #2 is running.
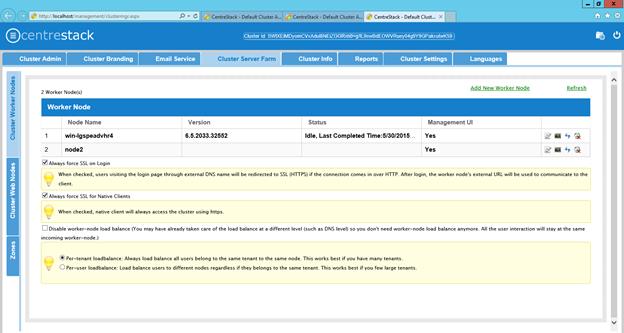
13.7 – Add the worker node 2 to the cluster
While we are doing sanity check for worker node #2, we can also register it to the cluster by log in as the Master Administrator. Go to the “Cluster Worker Nodes” page and do “Add New Worker Node”.
The Node Name will match the Host Name. The external URL will match the virtual IP or the DNS name for the load balanced DNS name. The internal URL will match the internal IP address or internal DNS name.
You can also repeat the same validation methods for the setup as we have done for worker node #1.
After it is added.
13.8 – Add the worker node #2 to the Load Balancer.
This step depends on the kind of load balancer you have.
Skip this if you are not using Windows 2012 NLB.
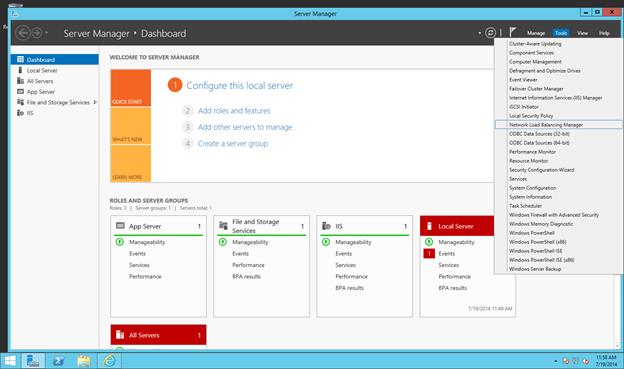
In the case of Windows 2012 R2 Network Load Balancer, You will add it in the “Network Load Balancing Management”.
After adding the Node2, it looks like this.
13.9 Pre-Compile ASP.NET Pages
It is not required to pre-compile ASP.NET pages because ASP.NET does just-in-time compile so the first user hitting a specific ASP.NET page will get the page compiled.
However, for best performance, we can precompile the ASP.NET pages.
PS C:\Windows\Microsoft.NET\framework64\v4.0.30319> .\aspnet_compiler.exe /v portal | Out-Null
PS C:\Windows\Microsoft.NET\framework64\v4.0.30319> .\aspnet_compiler.exe /v management | Out-Null
Step 14: Setup Worker Node #3
The step to setup worker node #3 is exactly the same as setup for worker node #2.
You can continue to use the GUI installer to setup worker node #3.
If you are using the script option, now it is a good time to put-it-all-together of the scripts we used setting up worker node #2.
Here is an example of the put-it-all-together script to run inside PowerShell window on Worker node #3.
Example Script running from beginning to end.
Windows PowerShell
Copyright (C) 2013 Microsoft Corporation. All rights reserved.
PS C:\Users\administrator> cd "C:\Program Files (x86)"
PS C:\Program Files (x86)> net use z: \\node1.tsys.gladinet.com\c$
The command completed successfully.
PS C:\Program Files (x86)> robocopy "z:\Program Files (x86)\CentreStack" "CentreStack" /s > copy.log
PS C:\Program Files (x86)> mkdir c:\depot
Directory: C:\
Mode LastWriteTime Length Name
---- ------------- ------ ----
d---- 7/19/2014 12:14 PM depot
PS C:\Program Files (x86)> cd c:\depot
PS C:\depot> copy z:\depot\*.*
PS C:\depot> reg import gladinet32.reg /reg:32
The operation completed successfully.
PS C:\depot> reg import gladinet64.reg /reg:64
The operation completed successfully.
PS C:\depot> dism /online /enable-feature /featurename:IIS-WebServer /all
Deployment Image Servicing and Management tool
Version: 6.3.9600.17031
Image Version: 6.3.9600.17031
Enabling feature(s)
[==========================100.0%==========================]
The operation completed successfully.
PS C:\depot> dism /online /enable-feature /featurename:IIS-ManagementConsole /all
Deployment Image Servicing and Management tool
Version: 6.3.9600.17031
Image Version: 6.3.9600.17031
Enabling feature(s)
[===========================99.8%========================= ]
The operation completed successfully.
PS C:\depot> dism /online /enable-feature /featurename:IIS-ASPNET45 /all
Deployment Image Servicing and Management tool
Version: 6.3.9600.17031
Image Version: 6.3.9600.17031
Enabling feature(s)
[==========================100.0%==========================]
The operation completed successfully.
PS C:\depot> dism /online /enable-feature /featurename:WCF-HTTP-Activation45 /all
Deployment Image Servicing and Management tool
Version: 6.3.9600.17031
Image Version: 6.3.9600.17031
Enabling feature(s)
[==========================100.0%==========================]
The operation completed successfully.
PS C:\depot> & 'C:\Program Files (x86)\CentreStack\AppConfigCmd.exe' configapp
PS C:\depot> certutil -p 2pwd12Apass -importPFX wildcard_export_1_20_14.pfx
Certificate "stargladinet" added to store.
CertUtil: -importPFX command completed successfully.
PS C:\depot> Import-Module WebAdministration
PS C:\depot> cd IIS:\SslBindings
PS IIS:\SslBindings> del *
PS IIS:\SslBindings> get-item cert:\LocalMachine\My\E88BC131D403B9EF5AA44DC520D3BABDB93E5886 | New-Item 0.00.0!443
PS IIS:\SslBindings>
Now reboot Worker Node #3 and it is ready. Now you can follow the same step as in worker node #1 and worker node #2 to add them to cluster and add them to load balancer.
After reboot, you can also optionally pre-compile the ASP.NET pages.
PS C:\Windows\Microsoft.NET\framework64\v4.0.30319> .\aspnet_compiler.exe /v portal | Out-Null
PS C:\Windows\Microsoft.NET\framework64\v4.0.30319> .\aspnet_compiler.exe /v management | Out-Null
Branding
Branding has two components. The first component is the self-service branding. The second component is Gladinet provided full-service branding.
Self-Service Branding
The self-service branding starts with the “Cluster Manager”. In order to start the branding, you will login to the web portal as the Master Administrator.
After you login to the web portal, click to the “Cluster Branding” Pages.
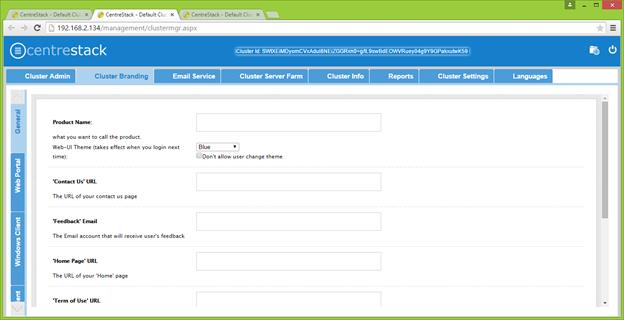
Best Practice to store self-service images. It is best to store the images under c:\program files (x86)\CentreStack\root\images. This folder is not part of the CentreStack install so you can create the folder and store images there. As this folder is not part of Gladinet Install, the folder will not be replaced during upgrade.
After that, you can reference the images using relative path such as /images/pic.jpg
If you use relative path, you can finish the branding first on worker node #1. After that, you can copy the branding artworks to worker node #2 and worker node #3.
Full-Branding Service
If you have full-branding service arrangement with Gladinet, you will also receive the Windows/Mac/Mobile client packages with full-branding artworks and access points built-in.
Upgrade
There are also two options to upgrade to a later build.
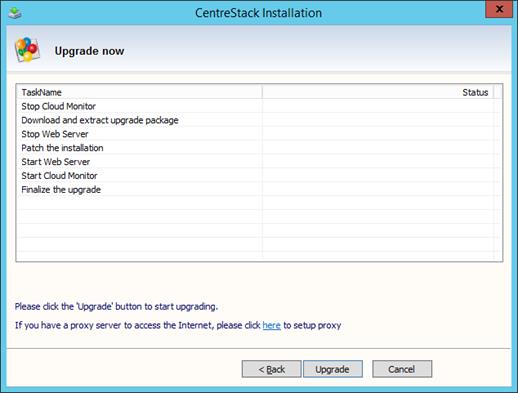
The first option is the same as the GUI installer. You can always run the GUI installer and the installer will detect the existing installation and perform an upgrade.
Option #1 – GUI Installer for Upgrade
Option #2 – Command Line Upgrade
The second option is also the script way of performing upgrade.
You will receive a zip file from Gladinet, which contains updated binaries for c:\program files (x86)\CentreStack folder.

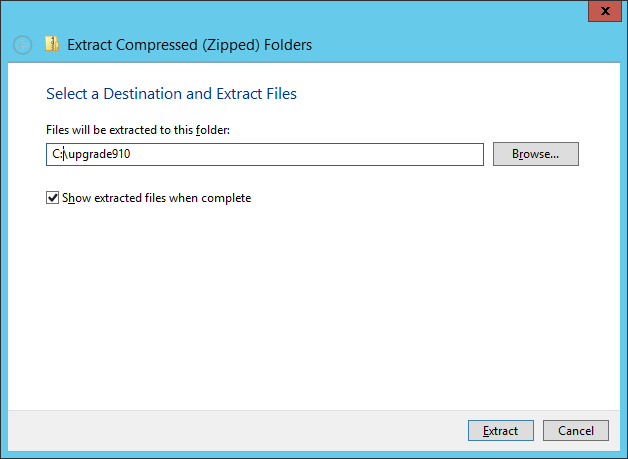
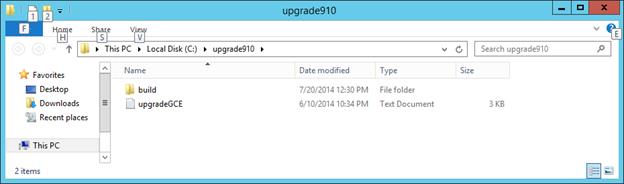
Step 1 – Unzip the Folder
Unzip the folder to a location, such as on node1 under c:\upgradeNNN\
After unzipping, it looks like this:
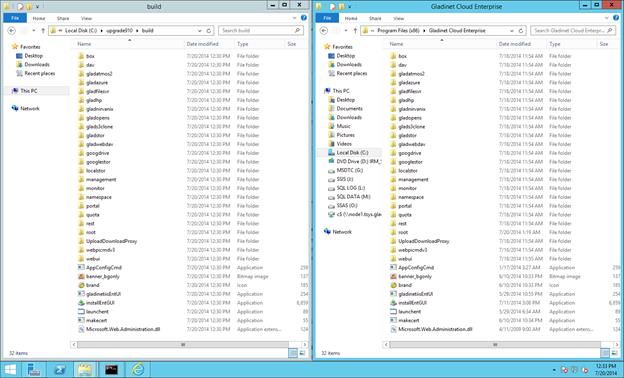
Step 2 – Copy files over to the Program Files.
When you compare the folder structure of the zipped folder, you will see it mirrors the existing folder structure for c:\program files (x86)\CentreStack. We will copy it over.
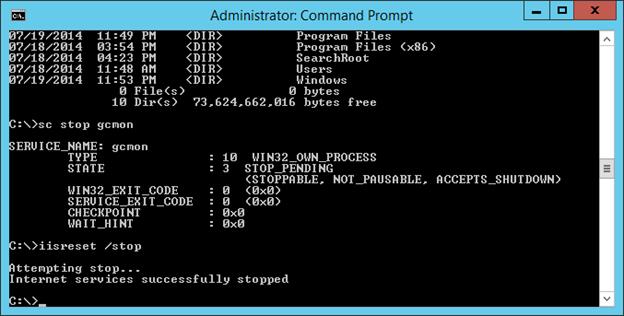
Before you copy it over, we need to stop two services.
sc stop gcmon
iisreset /stop
Now you can copy the files over, over writing existing binary files.
After you are done copying, you can re-start the services.
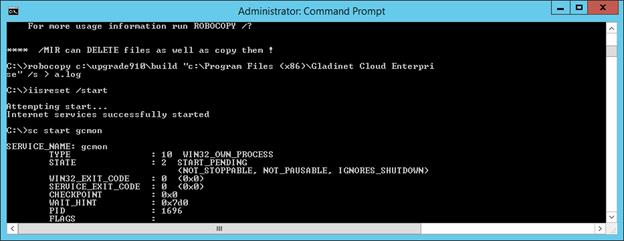
sc start gcmon
iisreset /start