|
Gladinet, inc |
|
CentreStack |
|
Administration Guide |
|
|
|
Gladinet, Inc. |
|
5/30/2015 |
|
This document discusses the CentreStack administration - Build 6.5.2033.32552 |
Table of Contents
Storage Manager Properties – Local Storage.
Storage Manager – Cloud Storage Property
Group Policy - Retention Policy
Group Policy - Home Directory Policy
Group Policy - Password Policy
Group Policy - Client Settings Manager Policy
There are two types of storage migrations.
Overview of CentreStack
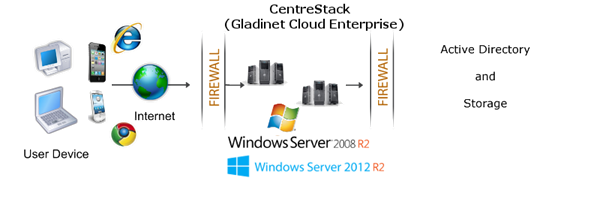
CentreStack provides value-added services on top of cloud storage services or local storage services. Cloud Storage services include those from OpenStack Swift, Amazon S3 and its compatibles, Google Cloud Storage, HP Cloud Storage and many others. Local Storage Services include file server Storage (Network Share and DFS share), SAN or NAS storage. CentreStack value-added services can be summarized as Backup, Access, Sync and Share, Identity, Control and Collaboration (BASIC), which is also known as EFSS (Enterprise File Sync and Share) solution.
CentreStack is a cluster of web services built on top of the Microsoft Web Platform. It provides the BASIC value-added services that facilitate online storage access for PCs, Macs, File Servers, Web Browsers, and Mobile Devices.
The services can be deployed in flexible combinations to meet different needs. For example, you can deploy it on premise as a private cloud; or you can deploy it off-premise in a data center, managed by your managed service provider (MSP); or you can deploy it in Amazon EC2-like environment as virtual-private deployment.
Please reference the “Deployment Guide” and the “Installation Guide” to deploy and setup CentreStack. This guide is focused on the administration of CentreStack.
Administration Scope
There are two administration scopes.
Cluster Administrator
Cluster Administrator can manage cluster-wide functionalities, such as email SMTP server setup, worker node properties and etc. In the Deployment Guide, often the cluster administrator is also referred to as the master admin.
Tenant Administrator
Tenant Administrator can manage tenant-wide functionalities, such as group policy. In the Single-Enterprise package, there is only one single tenant so the administrator manages both cluster administration and tenant administration. In the multiple-tenant Service-Provider package, each tenant administrator will be responsible for the tenant’s administration scope.
NOTE 1: All the administration work are performed over web portal inside a web browser. For web browser to perform administrative work in web portal, we recommend Google Chrome first, followed by Firefox, Internet Explorer, Safari and Opera.
NOTE 2: The very first user who installed the CentreStack is the cluster admin and also the tenant admin for its own tenant.
Cluster Manager
If you are the default cluster administrator, after you login, you will be directed to the cluster manager web portal page. If you have the Enterprise option instead of the Service Provider option, the first login may direct you to the default files and folders view.
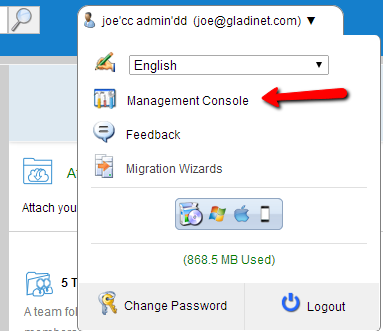
If you are at the files and folders view of the web portal, you can elevate twice to the cluster manager web portal. First step is to go to the “Management Console”,
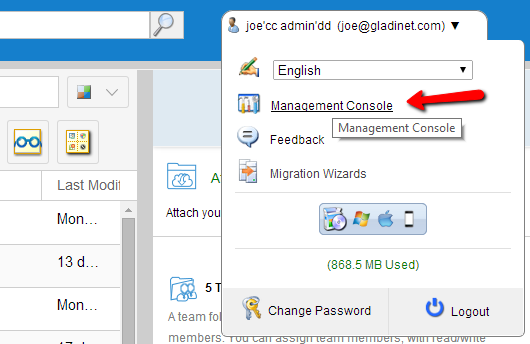
and after that, click on the “Cluster Management” to go to “Cluster Manager”.

Cluster Manager Web Portal
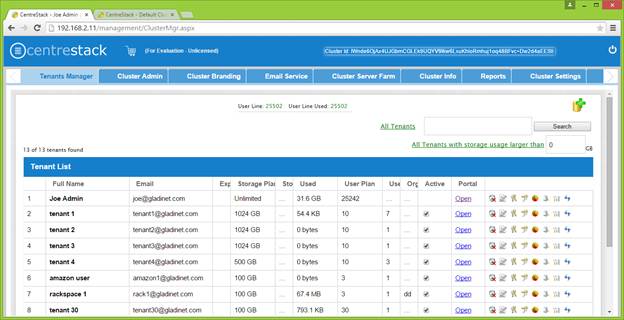
Cluster Manger is web based management tool for the whole cluster. It is organized into tabs. These tabs include “Tenants Manager”, “Cluster Admin”, “Cluster Branding” and so on.
Tenant Manager
For the Enterprise Package, the “Tenants Manager” tab will be hidden since it is one-tenant only. For the Service Provider Package, the “Tenant Manager” tab is the default view for the “Cluster Manager Web Portal”.
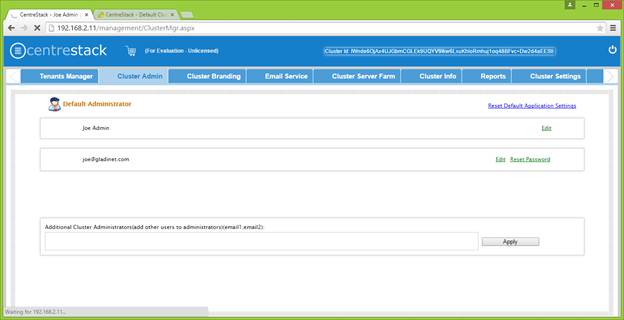
Cluster Admin
Cluster Admin tab is to change the properties of the default administrator and also to add additional people to be the cluster administrators.
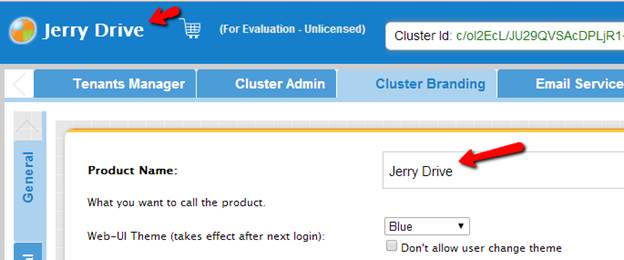
Cluster Branding
Cluster Branding is for changing the logo, bitmaps and other branding related information. There are two branding supports. One is self-service built-in branding, which is completely controlled by the “Cluster Branding” settings on the “Cluster Manager”. The other is full-branding service. Both rely on the “Cluster Branding” to change the look-and-feel of the web portal. Built-in branding will work with white-label clients, which upon the first connection to the cluster, will download the branding related information and use the branding related information. As compared to full-branding service, the full branding clients will have artworks, logo bitmaps and related information burned into the client binaries.
Product Name
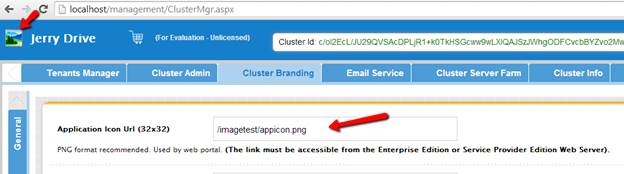
Application Icon Url
The best way to get icons to work is by putting the icon files on the same server and reference the icons via relative link. For example, you can create a sub folder under the Install Folder of the CentreStack, such as under root\imagetest folder.
Logo Url & Login Page Left Image

The branding of the icons and images require the icons and images with the same width/height as specified or same aspect ratio if the resolution is higher.
The rest of the branding entries are self-explanatory.
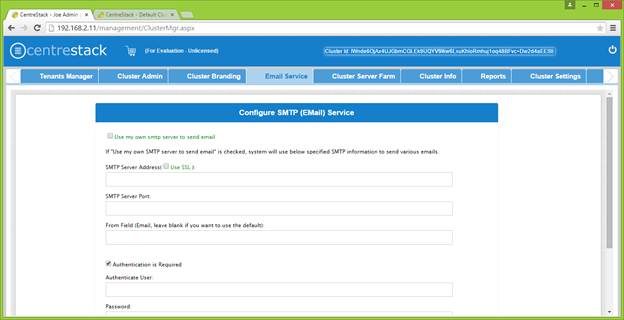
Email Service
There are many places in the CentreStack that need to contact the users via email. So the “Email Service” tab is used to set up the email account used for contacting users via email.
Most of the time, your email service requires user name and password to send out-going email via SMTP. If your email service doesn’t require user name or password, you can put dummy email and password there.
Cluster Server Farm
Cluster Server Farm has two types of nodes, one is “Worker Node” and the other is “Web Nodes”. Please reference “Deployment Guide” and “Installation Guide” for definition of these two types of nodes.
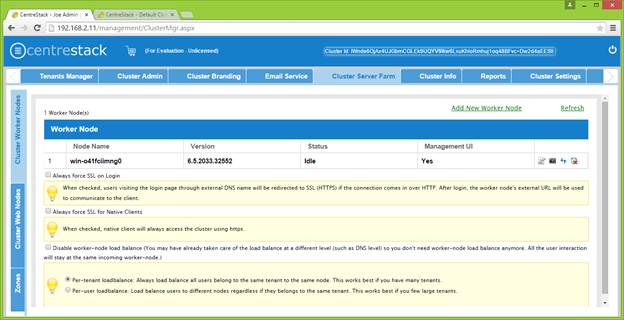

In a production environment, almost 100% of the time you will need to check “Always force SSL on Login”. When this is checked and when the CentreStack detects incoming connection is HTTP, it will do a redirect to HTTPS. If you turn on SSL, you will need to setup SSL certificate first.
However, if you have SSL-offload, such as that the SSL is offloaded to a hardware appliance, and after that, the incoming connection is HTTP between the hardware appliance and the CentreStack. In this SSL-offload case, you will NOT check “Always force SSL on Login” because it will create infinite redirect loop because the incoming connection is always HTTP as far as CentreStack is concerned.

In a production environment, almost 100% of the time you will need to check “Always force SSL for Native Clients”. Especially in the case of SSL-Offload, you MUST check “Always force SSL for Native Clients”. Otherwise, the CentreStack may think that the incoming connection is HTTP so it will continue to encourage the native clients (such as Windows client) to use HTTP instead of using HTTPS.
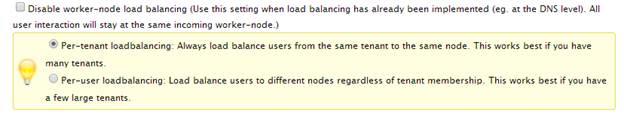
When you have your own load balancer, you will disable worker-node load balancing. CentreStack has built-in node-affinity load balancing, which can be per-tenant or per-user. When you have your own load balancer, you may have session-affinity or just simple round-robin, either one is fine.
Worker Node Properties
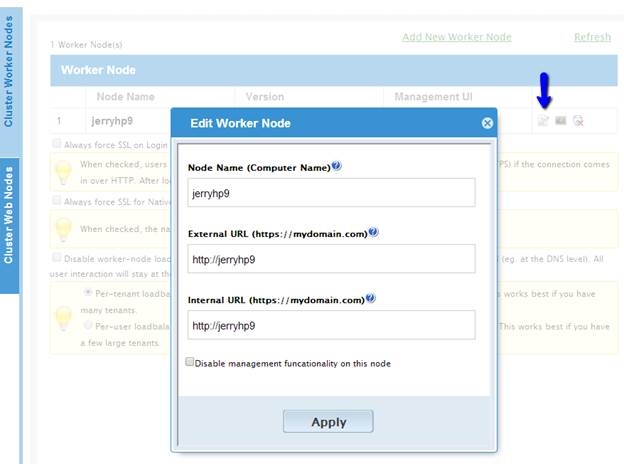
You may need to modify worker node properties when you setup the SSL and the DNS name for the cluster.
The Node Name needs to match the worker node’s hostname.
The External URL needs to match the worker node’s external URL. In a production environment, this typically is in an https:// format with the node’s DNS name.
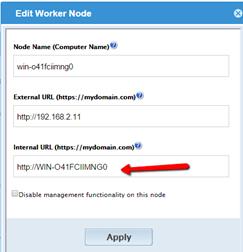
The Internal URL is the node’s internal URL, typically in the form of http://local-ip-address format.
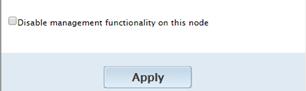
Disable management functionality – You can create an internal facing worker node (that doesn’t have an external URL) and only allow management functionality on this worker node. This is a security feature.
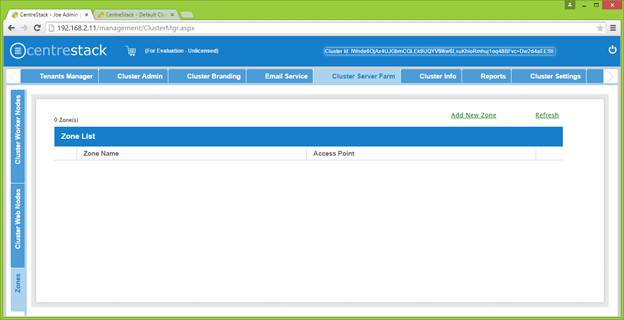
Zone
The concept of zone is to associate worker nodes with the location of the storage. When you think about zones, you will think about your storage location first.
For example, I have storage in LA so I have an LA zone. I also have storage in NY so I have a NY Zone.
You can have worker nodes from different zones as well and assign users to specific zone. If user’s home directory is coming from LA zone, the user will need to be assigned to LA zone.
Worker Node Health
You can use the Cluster Info tab to check out the worker node health.

Last Reported – You want to see this field has small numbers such as 6 seconds, 10 seconds. If you see sometime like 3 hours ago, that means the node is not reporting the health.
Total Requests Processed – You want to see this number as big as possible. This number is accumulative since the service was last re-started. So the bigger the number, the more stable the service is. Also when you have multiple worker nodes, you want to see the Total Requests distributed evenly among the worker nodes.
Request Executing – You want to see this number as small as possible. This mean the number of requests that are concurrently executing in the server. In general the number smaller than 100 is normal. Bigger than 100 is abnormal.
Last Request Time – You want to see this number as small as possible. This means the number of milliseconds for the last request. In general, numbers smaller than 3000 or 5000 are normal, which translates to below 3-5 seconds.
Pending Change Notification – For the files and folders that are changed, there is change notification written to database. In general, you want to see pending queue as short as possible.
Active Node Request – This are the clients out there contacting the server. Usually it is just for the reporting purpose.
Pending Change Polling – This is the clients out there polling to see whether there are files and folders that are changed. Usually the smaller the better.
Active Clients – For reporting purpose.
NOTE: If you don’t see the node performance report, check the InternalURL setting of each worker node.
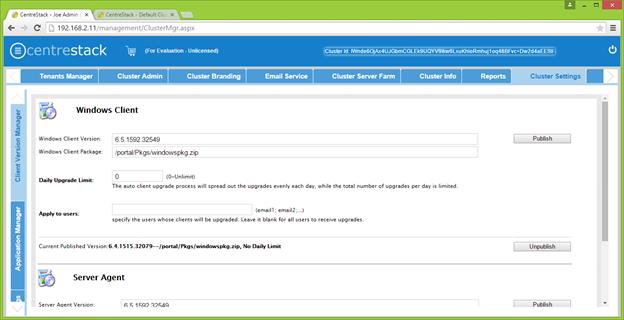
Client Auto Update
For Windows Client and Windows Server Client, there is auto client update feature. Each upgrade package contains the updated clients. By clicking on the “Publish” button, the newer package can be published to clients out there.
Daily Upgrade Limit: This is a per-worker node setting. For example, if you have 2 worker nodes, and set the daily upgrade limit to 100, maximum 200 clients will be upgraded per day.
Apply to Users: This typically is used for testing prior to push the client out.
Cluster Settings
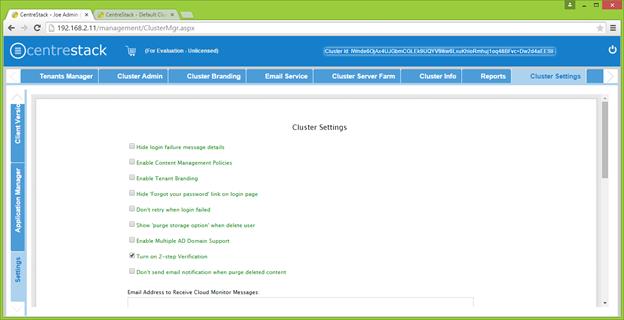
Hide Login Failure Message – When checked, the login failed message will be replaced by a very generic “Login Failed” message. When un-checked, it may return more meaningful login error, such as user-not-found, authentication-error and so on.
Enable Content Management Policies – Reserved
Enable Tenant Branding – When enabled, each tenant administrator will see the tenant branding page so they can further customize the look and feel of the product.
Hide ‘Forgot your password’ link on login – Most often it is used when Active Directory integration is set. The user will need to do forget-and-change password the normal Active Directory way instead of the way CentreStack provides.
Don’t retry when login failed – Most often it is used when the Active Directory user has low failed-count on lock-out policy. When the user’s password is wrong, a few retry can lock out the user’s Active Directory account. The retry feature can be used when there is no Active Directory lock out or when the lock out count is high.
Show ‘purge storage option’ when delete user - By default when a user is deleted, the user’s home directory storage content is not touched for later use or review. If it is desired to delete the user’s content when the user is deleted, this can show the purge option.
Enable Multiple AD Domain Support – When you have multiple Active Directory from multiple forests, you can turn on this option. The CentreStack software is capable of automatically search for domains in one single forest. However, for multiple forests, the software will allow you to manually enter the root of each domain when this option is enabled.
Turn on 2-step Verification – CentreStack supports Google Authenticator, Amazon Virtual MFA soft token for 2-step verification. When this setting is turned on, users will see the option to configure 2-step verification in their web portal.
Don’t send email notification when purge deleted content – When user deleted version folder or deleted items falls into the Trash Bin, the purge is asynchronous and scheduled at a later time. This setting controls the notification.
Web Browser Session Time Out – When the web browser client is idle for certain amount of time, you want to time out the web session. When set to zero, the web browser session will not time out. For a proof of concept environment, since users are doing more testing work, it is recommend to set it to zero so the web browser session will not time out.
Branding Id – This setting only apply to full-branding clients. For the full-branding client, it is possible to lock the full-branding clients to only connect to the branded CentreStack server. When set, it will lock out the white-label clients or other non-branding clients and will not allow them to connect.
License String – Reserved.
Logging DB Connection String – Related to split database.
Tenant Manager
Tenant manager scope is defined for tenant administrator. For a multi-tenant CentreStack system, each tenant has an administrator. For a single-enterprise CentreStack system, the default cluster administrator is also the tenant administrator.
Tenant Manager is completely web-based.
You will access the tenant manager by clicking on the “Management Console”.
Dashboard
Upon entering the Management Console, you will see the dashboard.
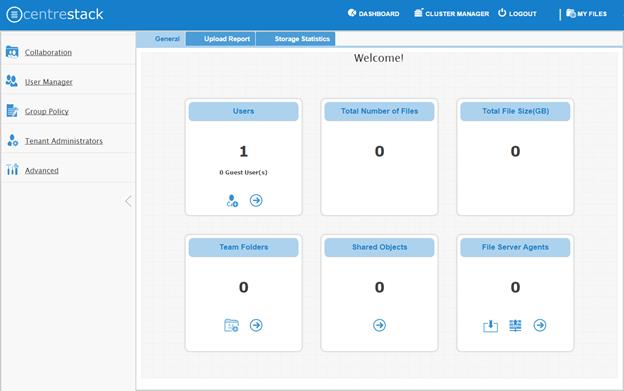
Collaboration
Collaboration has three tabs – Team Folder, Shared Objects and Storage Manager
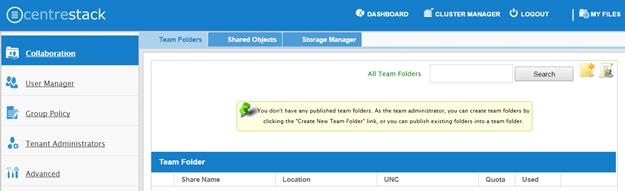
Team Folder – The team folder concept is like a network share, meaning you can define a folder and then add users and groups to the team folder. The team folder will show up in the user’s folder list when the user is added to the team folder. When the server agent is in use, the team folder can be mapped directly to a server agent created network share.
Shared Objects – Shared Objects are shared folders and shared files from user to user. It is like peer to peer sharing and the shared items are not limited to files, it can be files and folders.

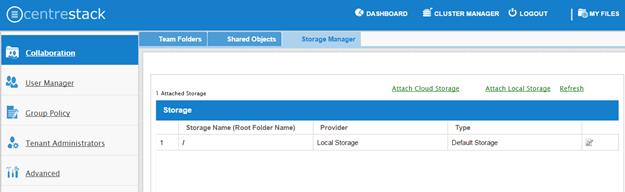
Storage Manager – You can mount different storage services into a single namespace. For example, if you have multiple Amazon S3 buckets, you can mount them all in. If you have multiple OpenStack Swift accounts, you can mount them all in as well. If you have multiple file server network shares, you can add them to the storage manager.
There are two links,
Attach Cloud Storage – for object storage services such as OpenStack Swift or Amazon S3.
Attach Local Storage – for block storage services such as Network Share.
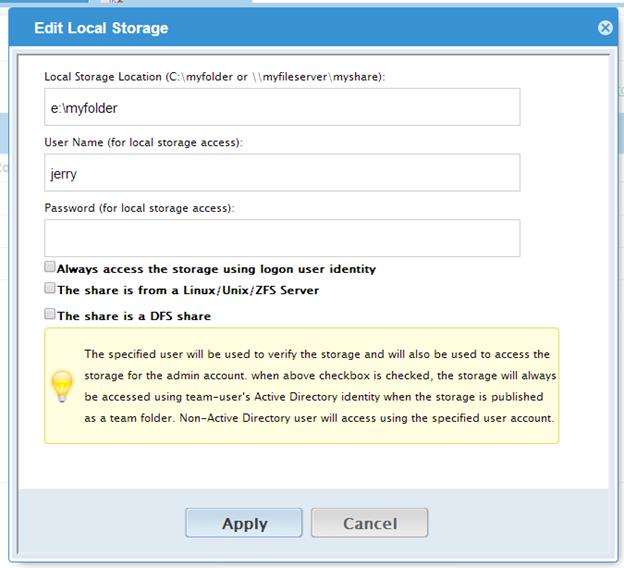
Storage Manager Properties – Local Storage.
“Always access the storage using logon user identity” – When you have Active Directory Integration, and mount an existing file server network share in, you can select to “Always access the storage using logon user identity” so the ACL on the file server share will be used natively. The access permission will be checked natively against the user’s Active Directory identity.
“The share is from a Linux/Unix/ZFS server” – Most of the time, you don’t want to check this flag because your file server share shall behave like a normal Windows Server share, even if it doesn’t come from Windows Server. In some small SOHO network storage devices, it may only allow one connection from one IP address, so if that is the case, you want to check this flag. Most of the time, you just don’t need to check this when the network share is capable of taking multiple connections/sessions from one single machine.
“This share is a DFS share” – If the share is a DFS share, you will check this checkbox, because DFS share has an extra layer of translation to translate back down to normal file server shares.
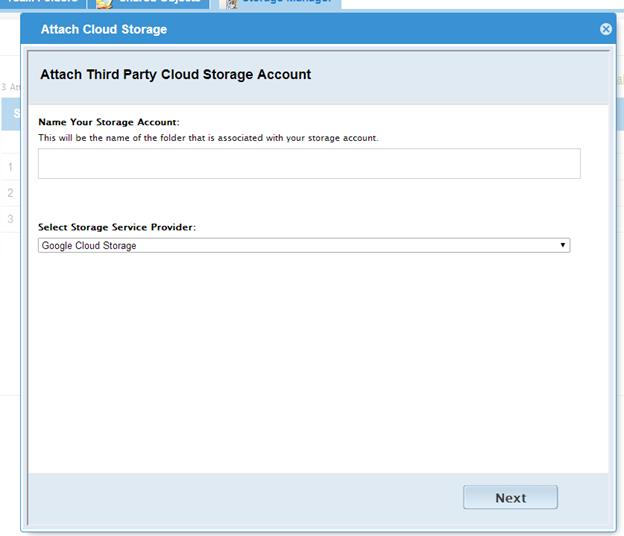
Storage Manager – Cloud Storage Property
Besides local storage, you can also mount cloud storage into the system. If you have Amazon S3, or Amazon S3 compatible storage service, or if you have OpenStack or OpenStack Swift compatible storage, you can connect it into the system. You can see the full list of storage services supported, including SoftLayer Object Storage, Google Cloud Storage, Microsoft Azure storage and more.
User Manager
User manager has four tabs – User Manager, Guest User Manager, Group Manager and Role Manager.
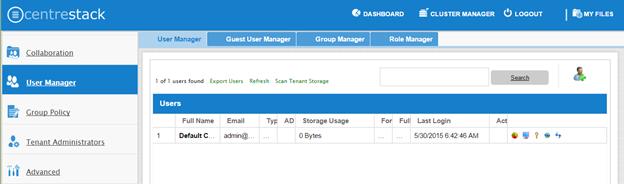
Regular User Manager
The first tab is the Regular User Manager. These are the users that have full privilege of home directory, sharing and other features. If you have Active Directory, normally these are the users in the Active Directory.
Guest User Manager
Guest users are users that don’t have a home directory. The only folder they have is “Files Shared with Me”. So they rely on other “Regular User” sharing files and folders with them before they can do anything. If nobody is sharing anything with a guest user, the guest user doesn’t have any read/write permission to any folder.
Group Manager
When you have Active Directory integration, you will leverage Active Directory group instead. This group manager is to create group of users in a simple way. It is not as complicated as Active Directory (such as supporting nested groups) but make it easy for non-Active Directory users.
Role Manager
Role Manager is to provide role based administration. For example, you may want to provide read-only permissions to some users. You can also assign some group policies to some groups of users.
Group Policy
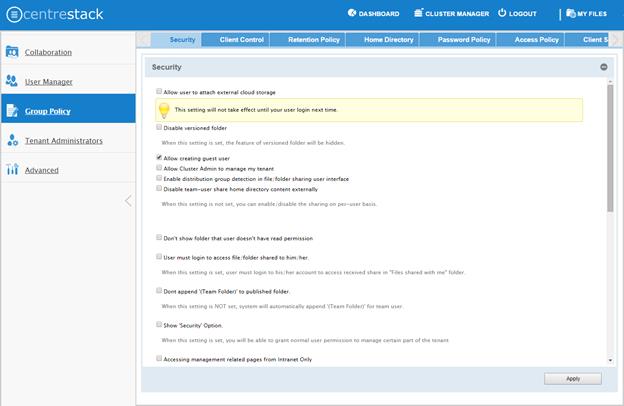
Group Policy –Security
“Allow users to attach external cloud storage” – when checked, you will allow users to see storage manager and allow them to attach external storage such as their own Amazon S3 bucket into the system.
“Disable Versioned folder” – Normally you will NOT disable versioned folder. Because versioned folder is the supporting feature for “Two-way sync locally attached folder”. If you disable versioned folder, you will lose the two-way synchronization folder feature as well.
“Allow creating guest user” – When checked, you will allow creating of guest user when team user share files or folders with external users. When disabled, the file/folder sharing is limited to regular users only or anonymous users only.
“Allow Cluster Admin to manage my tenant” – when enabled, the cluster admin will be able to use “open” link to manage the tenant in the tenant manager.
“Enable distribution group detection in file/folder sharing user interface” – With active directory integration, sometimes you want to share files and folders with a distribution group. This feature allows detection of distribution group and expand the group so the sharing will be done with the users in the group, instead of using the group as a single user.
“Disable team-user share home directory content externally” – This feature disables the ability for regular user to share home directory contents for security reasons.
“Don't show folder that user doesn't have read permission” – With native Active Directory integration and with network share as backend storage, the user’s permission to the folders are checked natively. When this option is set, for those folders that users doesn’t have read permission, the folder will be hidden.
“User must login to access shared files/folders” – When sharing files and folders with users, you can force the sharing to create guest accounts for users that are not already in the system. It is more secure when asking the receiver of the share to sign in to receive shared items. This disables the anonymous sharing.
“Don’t append (Team Folder) to published folders” – A team folder by default, when showing up in a team user’s folder list, it will have “(Team Folder)” appended to the end of the folder name to signify it is a team folder. This feature allows a team folder showing up as it is without the (Team Folder) suffix. The use case is that when a network share is mounted and then turned into a team folder, since the users are already familiar with the network share in its original name, so it is not necessary to append (team folder) to the folder name. You shouldn’t change this setting in the middle of operation because if users have pending upload/download, changing the name could cause those tasks to fail.
“Show ‘Security’ Options” – The security option is for delegated administrators. Each management scope such as team folder, storage manager may be protected by a “security” option. By default, only tenant administrators can access these administration pages. But if you want to expose the management scope to more users, you can expose the ‘security’ option to define more users for only “Team Folder’ or only for “Storage Manager” and etc. This feature may be overlapping with the Role Manager. You can also create roles and assign users to it to achieve the same goal.
“Access management related pages from Intranet Only” – Intranet is defined as 10.x.x.x or 192.168.x.x kind of IP addresses. Usually you can achieve the same functionality by disable the management functionality on external facing worker nodes but enable that for an internal facing worker node. But if your intranet meets certain IP address criteria, you can use this setting to achieve that goal too. It is a security feature to limit the management scope to intranet only. As mentioned above, an alternative way is to go to the cluster manager, then cluster server farm and disable the “management functionality on this node”.
“File upload and download must go through worker node” – For Amazon S3 type of cloud storage/object storage, it is recommend NOT to force file upload and download going through worker nodes, because Amazon S3 is good for offload the upload/download to between the access clients and the backend Amazon S3 storage. However, for OpenStack Swift storage, depending on how it is setup, you may want to turn this on to force File Upload/Download going through worker node for security reason.
“Disable User’s home directory” – For some organization, they want all users work inside team folder. These organization doesn’t want users to have home directory – perceived to have personal documents. This feature can disable the user’s home directory. Usually this setting is combined with publishing of team folders to all active directory users.
“Show User list in sharing dialog” – This is a convenience feature, if you want to have user list in the sharing dialog so it is easier to share without typing. However, it may be conceived as a security issue since user’s emails are showing up.
“Only allow sending shares to the specified domain” – You can further limit the sharing to some domain instead of random email. For example, if your primary collaboration target is with ACME corporation and you can limit the sharing to your domain and also ACME domain.
“The Account lockout threshold sets the number of invalid logon attempts that are allowed before an account is locked out.” - You can force lock out of an account. This setting is independent of your Active Directory account lock out if you enabled Active Directory integration. For example, if your Active Directory account lock out is 7 times, and you can set CentreStack accout lock out to 5 times, smaller than your Active Directory account lock out.
“Expiration Time for Shared Folder/File (Days):” – When set, during the file/folder sharing wizard, the expiration time dropdown selection will not be shown, it will be pre-set to expiration set in here.
“Don’t create a guest user account if the recipient is from the following domain” – If guest account is not created, these sharing will be with email address only.
Group Policy – Client Control
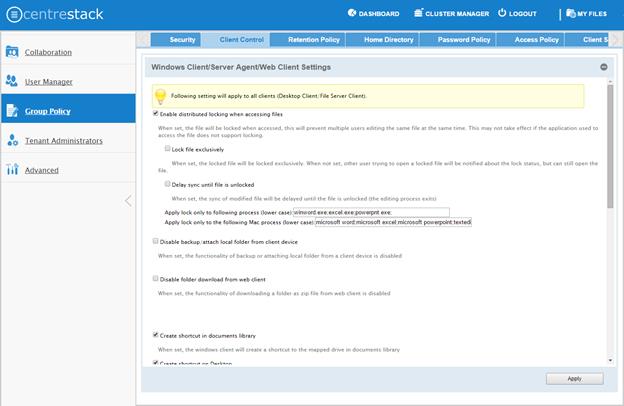
“Enable Distributed locking when accessing files” – In CentreStack, there are two ways to lock files, one is manually by right click on a file and do “Check out”. The other way is automatic based on certain binary executables. For example, you can see Microsoft Office executable files like winword.exe and so on.
“Lock file exclusively” – When set, the other user won’t be able to open the file for edit.
“Delay sync until file is unlocked” – It is recommended to check this setting. Most users have habit to save files in the middle of editing. You don’t want these edit to go every time to the cloud for these intermediate saves. You want to do a save to the cloud at the end like a grand finale. So you can delay sync until file is unlocked.
“Disable backup/attach local folder from client device” – Attached Local Folders are two-way synchronization folders. In order to do version backup and two-way synchronization, there are multiple folder structures created in the backend storage. Some organization doesn’t need this feature and want the users to work exclusively with the cloud drive.
“Disable folder download from web client” – The folder download from web client will zip up the folder and download it. It is CPU intensive so if you don’t want it to be consuming too much CPU, you can disable it.
“Hide ‘Files shared with me’ folder” – Some organization wants users to work exclusively inside a team folder, without home directory and without the peer-to-peer sharing folder.
“Create a shortcut in the documents library” – This is a convenience feature to add a link to documents library to the cloud drive.
“Create shortcut on desktop” – Same as above but the shortcut is on the desktop.
“Disable Search” – If you don’t need the search by file name feature, you can disable it.
“Web Browser - Disable Java Uploader” – Some organization standardized on web browser, for example, all web browser are HTML5 compliant. In this case, Java Uploader is not necessary and could be confusing to support when different users have different Java version installed.
“Web Browser - Disable Flash Uploader” - Some organization standardized on web browser, for example, all web browser are HTML5 compliant. In this case, Flash Uploader is not necessary and could be confusing to support when different users have different Flash version installed. Different kind of web browser may also have different levels of Flash support, causing different behavior.
“Enable Tabbed-Browsing in User Manager” – When enabled, the user manager will order users by their last name so if you have many users, you have an easy to access way to find the users.
“Only show search interface in User Manager” – When you have even more users, Tabbed-Browsing can’t handle it any more, you can enable search-only interface.
“Hide Settings in Windows Client Management Console” – The Settings in the Windows client may be viewed as “too much information for normal user”. If that is the case, you can disable that.
“Don't Allow Setting Changes in Windows Client Management Console” – When you want the client settings to be centrally controlled.
“Allow syncing empty file” – By default, empty file (0-byte) will be skipped for syncing in attached folder. When enabled, those files will be synchronized.
“Don’t show top help panel in web portal” – In the web portal for new users, it may show a help panel about where to download client and those kind of information. The panel may be viewed as clunky for experienced user so it is possible to hide it by group policy.
“Allow attaching folder in proxy mode” – proxy mode is a mode that the local folders are not actually going to the cloud, but instead, the access are proxy back to the local folder. It is not a usual mode of operation so if you need it from server agent, you can enable it. By default it is disabled.
“Show advanced setting in team folder publishing dialog” – The advanced setting refers to “Create CIFS Share”, “Disable further sharing”, and “Disable Offline Access” settings.

“Disable Windows client in-place upload” – Normally you don’t want to disable it. If it is disabled, the files that are being uploaded will be copied into cache first before upload, thus creating two copies of the same file in the file system, one at the original place, one in the cache.
“Disable Auto-Login next time” – When you want the user to type in username/password every time they login to the Windows client, you can disable auto-login.
“Disable drag & drop handler” – Normally you will not disable it. If it is disabled, the Windows file drag and drop will take over, this typically means the files will be copied into cache before upload, thus resulting in two copies of files being uploaded.
“Enable snapshot backup for server agent” – It is a feature related to server agent on Windows 2003-2012 servers.
“Enable auto-install of Outlook Plugin” – CentreStack Windows Desktop client comes with outlook plug-in. If enabled, the outlook plugin will be enabled upon client running.
“Files with the following extensions will be excluded from uploading” – You can stop certain file types from being uploaded. For example .pst file. These are local outlook email file, which is not necessary to put to cloud storage because usually it is backed up by exchange server.
“In-place editing/Preview is disabled for files with following extension” – Windows Explorer has a habit to peek into large files to generate thumbnail and present other information. It may not be a good fit for cloud drive files because each peek will generate a download from cloud.
Group Policy - Retention Policy
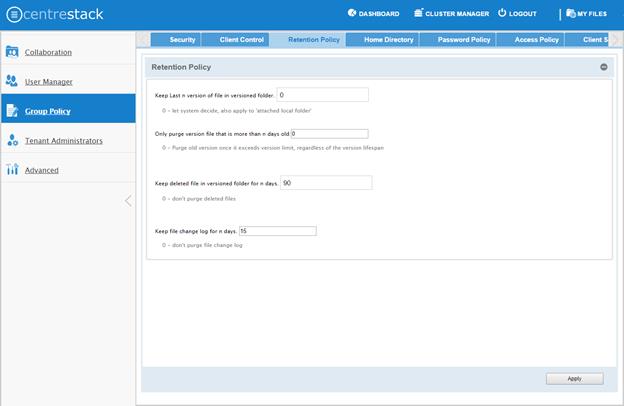
The cloud monitoring service on the CentreStack system will be responsible for the retention policy
“Keep Last n version s of each file in the versioned folder” – You can decide how many versions of files to keep in the version folder.
“Only purge version file that is more than n days old” – security feature. For example, there is a virus modified the same file many times so it created many versions causing good old versions to be scheduled for deletion. However, with this set, the good old versions will be kept for at least the amount of days so give enough time to recover.
“Keep deleted files in versioned folder for n days” – When a file is deleted in the version folder, it is not actually deleted. It will be kept for several days defined here.
“Keep file change log for n days” – file change log is the biggest database table and could be growing without trimming. You can decide how often you want to trim the table.
Group Policy - Home Directory Policy

“Default Storage quota” – This policy will not affect existing user and their quota. It can affect newly created user for the default storage quota.
“Create default folders” – When the new user account is provisioned, the default root folder is empty. “Create default documents and pictures folder” will make the root folder look less empty and more user friendly. It is kind of like a hint for how to organize files and folders in the cloud.
Group Policy - Password Policy
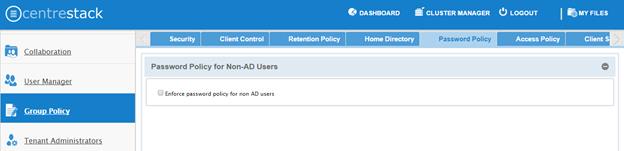
You can enforce password policy for users in the system. Normally the Active Directory user’s password complexity is already enforced by Active Directory. This setting is used to control users that are not in the Active Directory. For example, guest users.
Group Policy - Client Settings Manager Policy
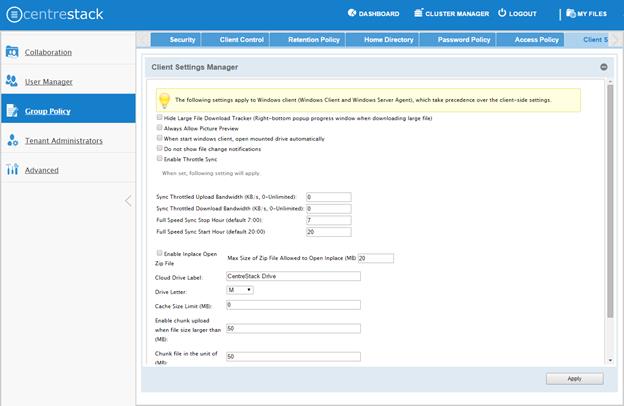
You can define server side setting that override the client side of the settings. When the settings are set in the server side, the client side of the settings will lose precedence to the server side settings.
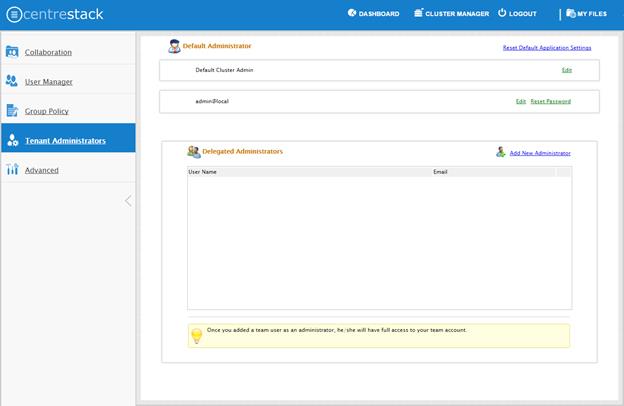
Tenant Administrators
You can define a group of administrators here.
Advanced Information
Active Directory Settings
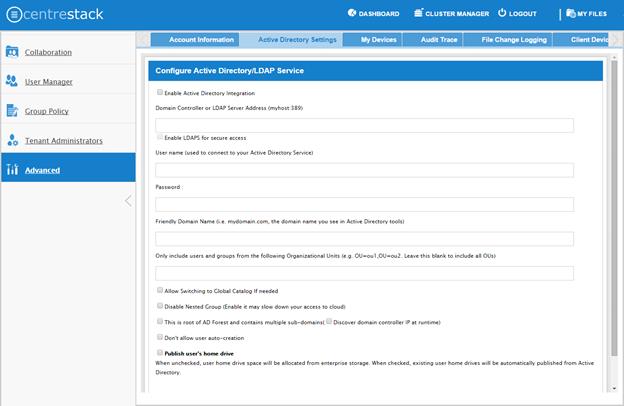
“Enable Active Directory Integration” – You will check this when you want to integration with Active Directory.
“Domain Controller Address” – The domain controller’s address, typically in the form of DNS name.
“User Name” – This is recommended to be a service account (password never expire, account never disable” so the user will be able to query LDAP for users and authenticate users on the login user’s behave.
“Password” – This is the password for the service account for the “User Name” field.
“Friendly Domain Name” – This is typically the domain name you see in the Microsoft Domain and User tool. It needs to be exact match of the domain name. Otherwise, you will see error message about “referral is required” , which translates to the domain controller didn’t match the domain name and need to refer you to somewhere else for another domain name.

“Only Include users in Organization Unit” – when you type in the organization unit, you don’t need to type the domain part any more. It just need the Organization Unit part of the string. This is allowed for only single Organization Unit specified in its distinguishedName format without the domain suffix.
“Allow Switching to Global Catalog” – For some organization that has multiple domain, sometimes there is a Global Catalog that stores everything inside. This may be required if you have such situation.
“Disable Nested Group” – Normally you will disable this if you have many groups. The nested group may slow down the look up and login speed.
“This is the root of the AD forest and contains multiple sub-domains” – CentreStack support multiple domains in the same AD forest. You will need to point to the root of the AD and it is capable of finding all the sub-domains.
“Don’t allow user auto-creation” – By default, the Enterprise package is capable of creating users upon first login into the web portal. However, for big enterprise, they may want to control the pace of adding users to the system so they will disable this feature.
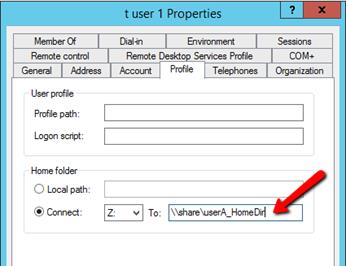
“Publish user’s home drive” – In the user’s Active Directory profile, there is a setting about home directory. The same home directory setting can be used to map user’s active directory home directory in to the cloud drive’s home directory.
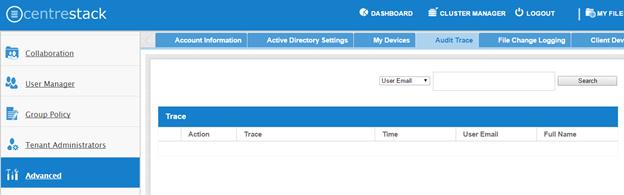
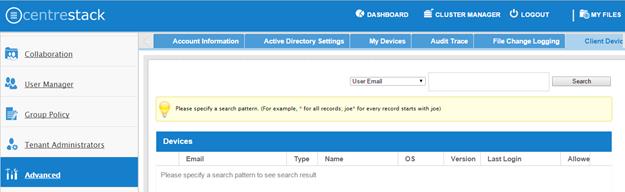
Audit Trace
Audit trace contains the management events, such as login success, login fail , shared a folder and etc.
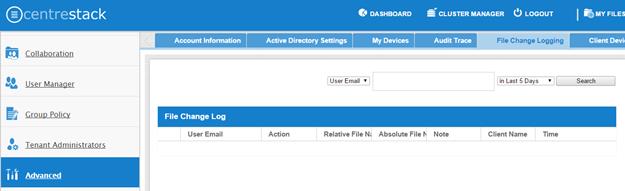
File Change Log
File change log is capable of search for user’s file change history. It is most useful when helping user troubleshoot issues. For example, you can point to the file change log and say, you deleted this file on this day.
Client Device Manager
This feature is used to control BYOD. For some organization, they want to control who can bring what device into the system. This is the tool to control that and allow/disallow on a device by device basis.
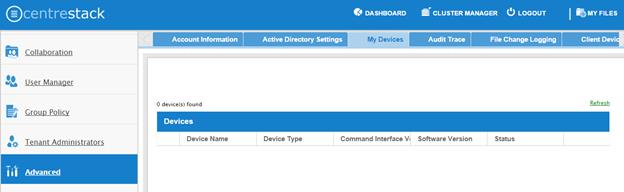
My Devices
It is similar to Client Device Manager. It is looking at user’s devices from a different perspective.
Helping and Supporting User’s File and Folder List
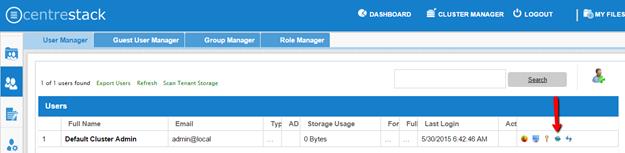
An admin can view a user’s file and folder list using the eye icon for the user in Management Console\User Manager.
Storage Location Migration
There are two types of storage migrations.
1. Migrate data to a different location in the same type of storage using the steps below:
a. Identify the location of the current storage
b. Copy the content to the new location (for example, you can use xcopy *.* from the old location to the new location
c. Login to web portal as master admin.
d. Launch Management Console\Collaboration\Storage Manager and click on edit to point to the new location
2. Migrate data to a different type of storage using the steps below:
a. Go to the registry using regedit
b. Go to HKLM\SOFTWARE\Gladinet\Enterprise\ and add a new string value called ‘CanChangeDefaultStorage’ and set the value to ‘True’ and reboot
c. Edit the storage type using new icon to edit storage under Cluster Manager\Tenant Manager
Note: It is not recommended to modify registry settings. Take a backup of the registry before modifying any registry settings.